
This post is also available in:
![]() Português
Português
In this post, we will make Oracle EM 12c monitor a new target (in which case it will be a Oracle Database non-RAC).
In this example, we are dealing with an Oracle 11gR2 single instance database running on a Linux x86_64.
The steps to be performed are:
- Configure the Linux OS of the database to be monitored.
- Configure the Oracle database to be monitored.
- Deploy OS agent using EM 12c.
- Add the database to the panel in EM 12c.
Let’s start.
The first step is to create the user on the target OS that will insure the implementation of the client’s agent in EM. Open the operating system of the target database and run the following commands:
(As root)
[root@oradbserver ~]# useradd -g oinstall emc12
[root@oradbserver ~]# passwd emc12
Changing password for user emc12.
New UNIX password: #Generate a random long password and write down, that user is in the group oinstall and can do great damage.
Retype new UNIX password:
passwd: all authentication tokens updated successfully.
[root@oradbserver ~]# mkdir -p /u02/app/emc12/emagent
[root@oradbserver ~]# chown -R emc12:oinstall /u02/app/emc12
Now that the user is already created, lets set the hostname of the EM server and set the PATH variable:
### Add the following lines at the end of emc12 profile
umask 027

export ORACLE_HOME=/u02/app/emc12/emagent/core/12.1.0.2.0

PATH=$PATH:$ORACLE_HOME/bin

### Add the following lines at the end of /etc/hosts

#EMC 12C
10.1.1.10 ec12mntrjr001.localdomain ec12mntrjr001
Now, log into the instance to be monitored, unlock and change DBSNMP password. Put a random long password, and write down.
alter user DBSNMP identified by faoi32i98aj1la account unlock;
Now that the OS and DB is already ready to be monitored, we open the EM 12c and add the host.
Log into the EM with the SYSMAN or a user who has administrator permission. Go to “Setup -> Add Target -> Add Targets Manually.” Click the “Add Host …”.
Let the name of the session as it is. Press “Add” and fill in the IP of the server where the user emc12 was configured.
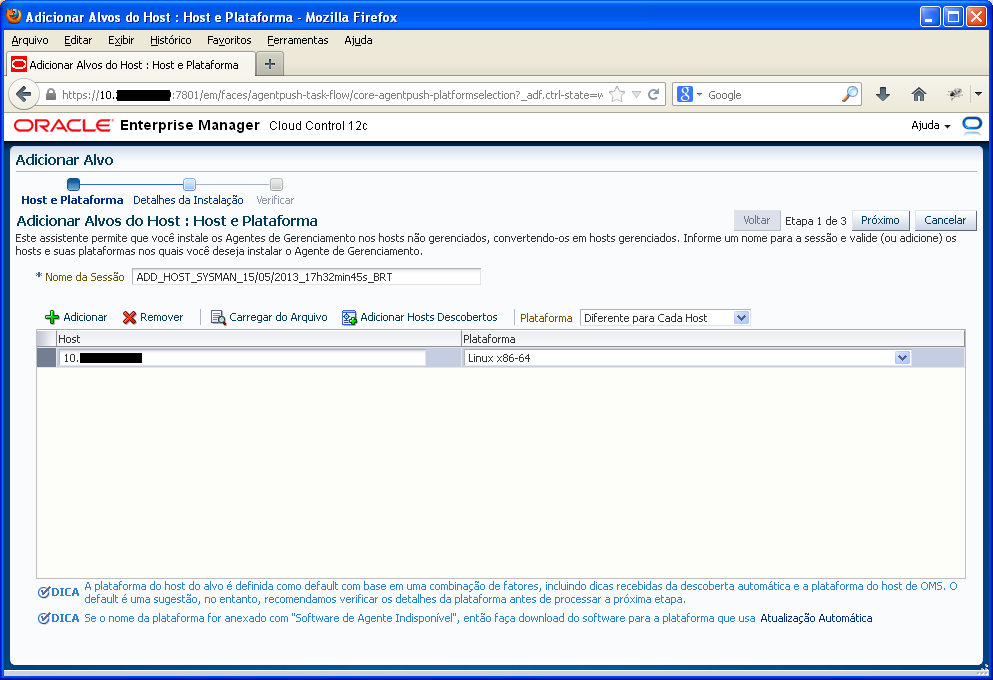
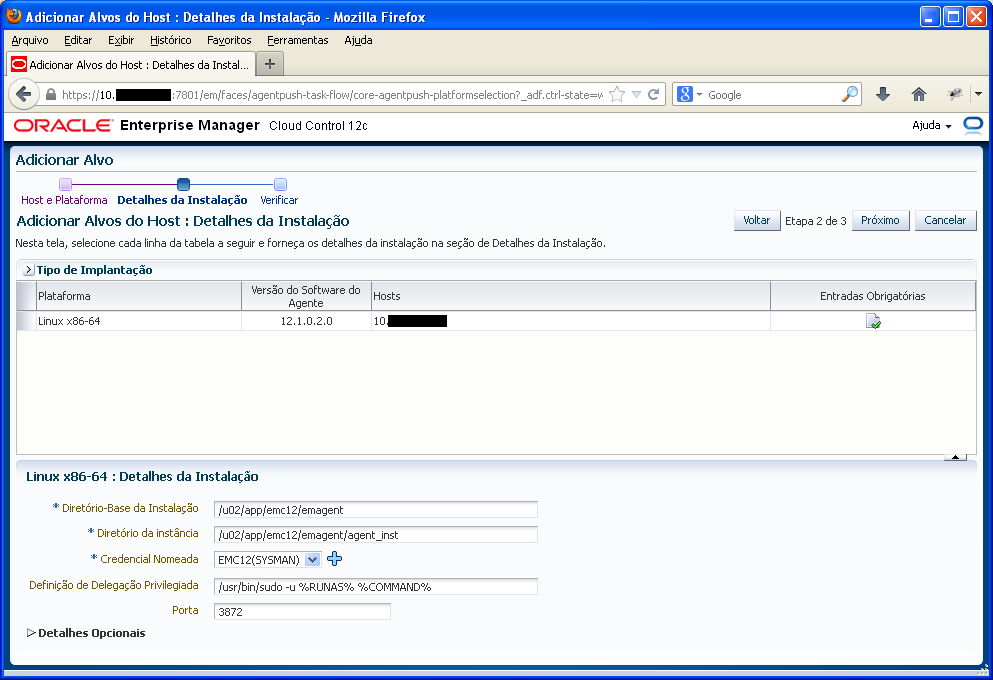
On the next page, fill in the data and the directory created on the server. There is no problem if the user emc12 does not have permission to run the “sudo” command, we will run the root.sh script manually at the end.
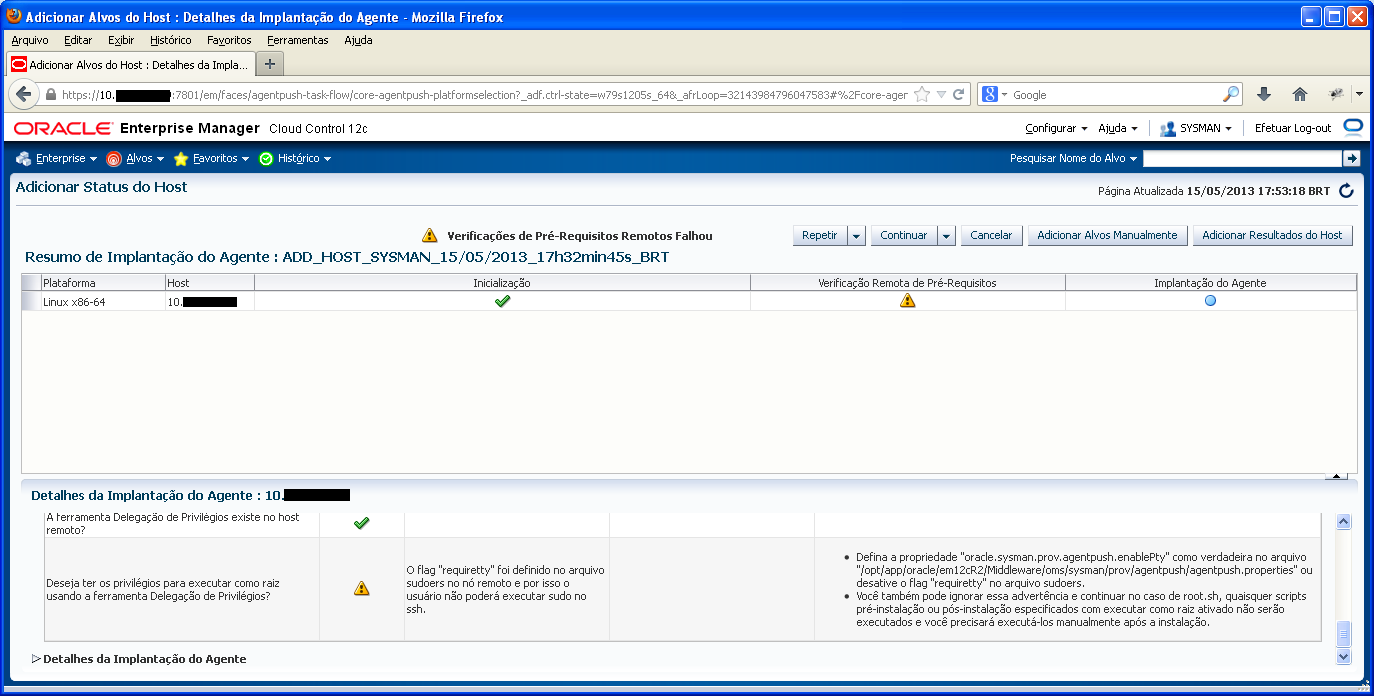
Check the information and click “Next”. On the next page, select “Deploy Agent” and wait. It will take a while depending on the link between the server and client.
The best way to monitor progress is to open the target OS and run the following command:
[root@oradbserver emagent]# du -sh /u02/app/emc12/emagent/
129M    /u02/app/emc12/emagent/
In this case, only 129 MBs of total was transferred. The size can vary, but it is almost 231 MBs.
NOTE: If your connection to the EM drops for some reason, it will continue running the deployment job. You can go back to execution screen going through the menu “Setup -> Add Target -> Add Targets Manually”, going on the “Add Host Results” and selecting the session of agent deploy (probably the last).
Once finished, we should check if there is any warining. The case that there is only referring sudo permissions, we can ignore.
Select the “Continue -> Continue All Hosts” and wait for the end of the deployment.
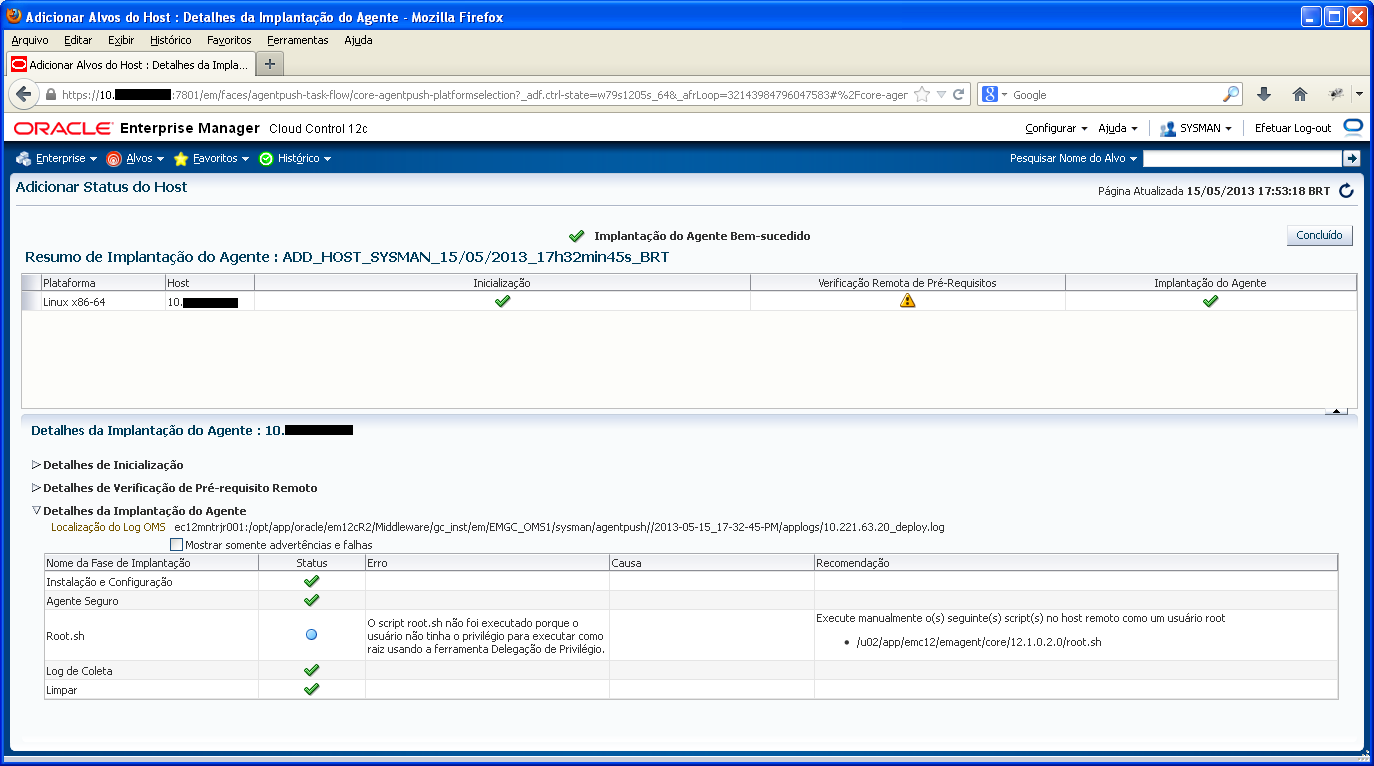
Now it’s time to run the root.sh script on the host:
[root@oradbserver emagent]# /u02/app/emc12/emagent/core/12.1.0.2.0/root.sh
Finished product-specific root actions.
/etc exist

Creating /etc/oragchomelist file...
Finished product-specific root actions.
Click “Done” and good job, agent deployed. Let’s now add the target database.
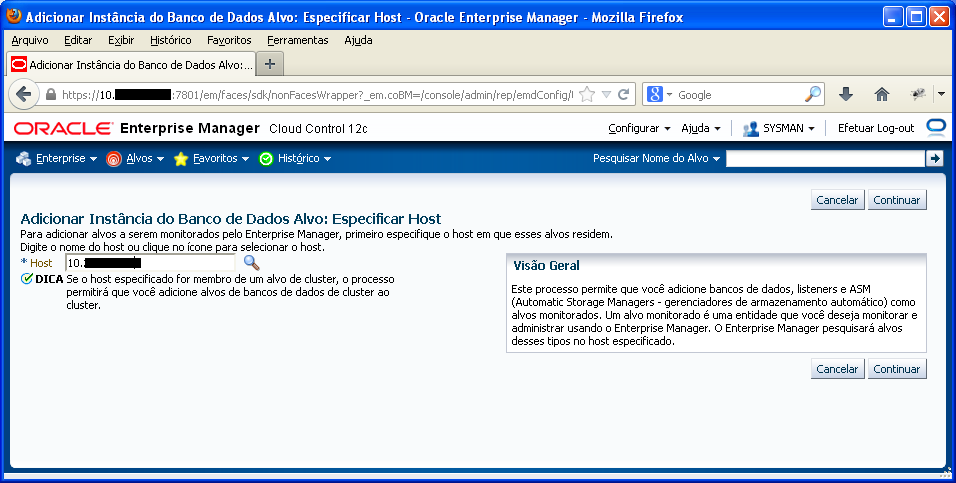
Go to “Targets -> Database”. In this new screen, select “Add -> Oracle Database.”
Fill in the IP of the target server and proceed:
At this point, the agent will try to locate any target trackable on your database server. When finished, it will display your instance as the screenshot below:
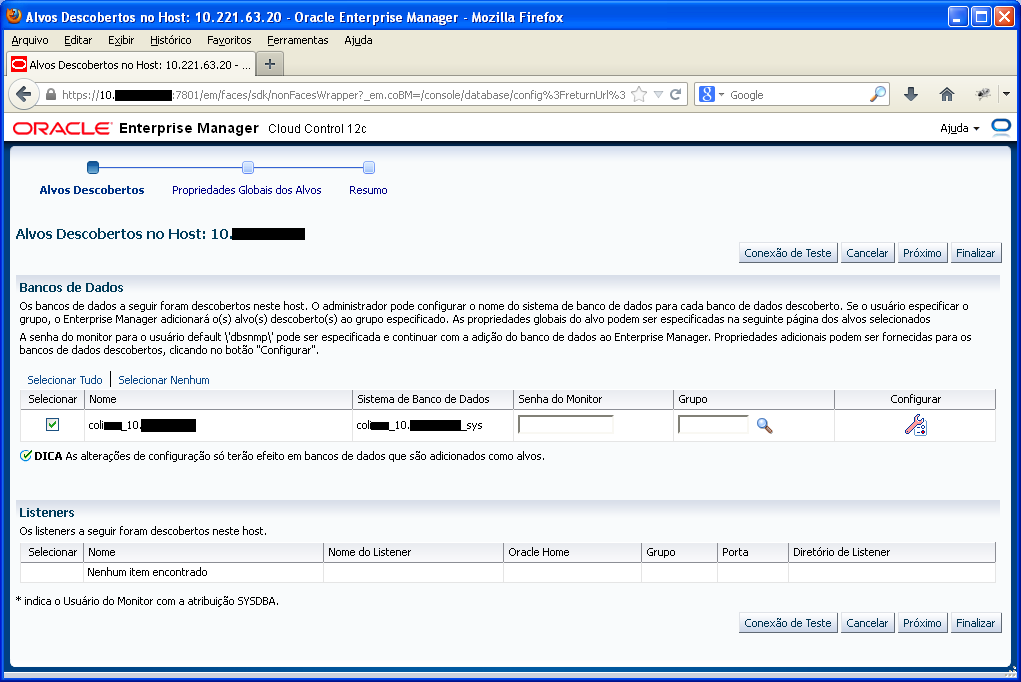
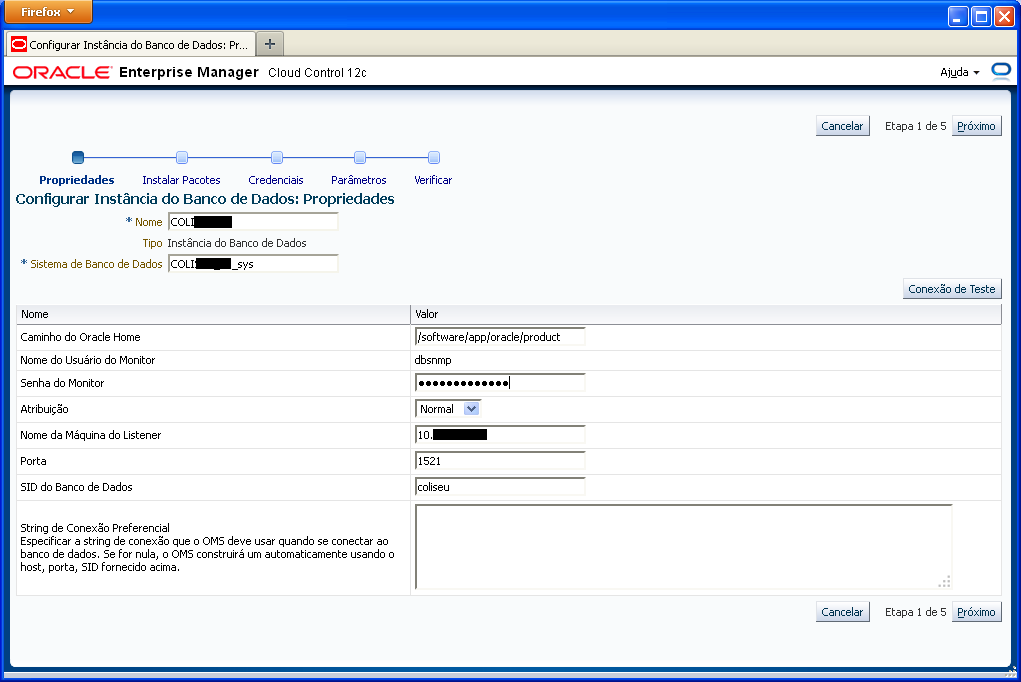
Click Configure and enter the password of DBSNMP, already defined. Take the opportunity to rename the database and the database system. Finally, test the connection, click “Next” and then “OK”.
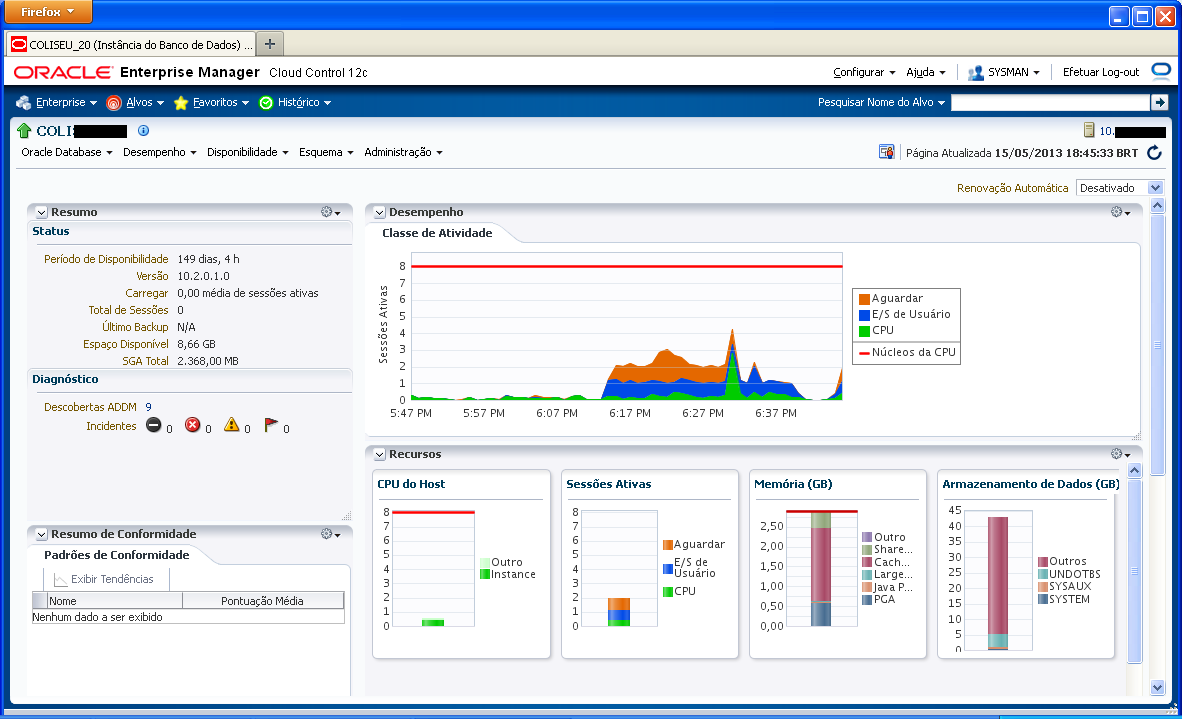
When you return to the Home screen, go to “Finish” and then “Save”.
Ok, your target is set. Now you can monitor your database. Go on the “Targets -> Databases”, open your body and monitor your database.
Have you enjoyed? Please leave a comment or give a 👍!


3 comments
Great, Nice presentation Rodrigo.
Very east to understand and implement.can you also let us know How do you configure database backups in OEM step by step with screenshots.
Thanks, but login credentials failing for me its in Linux
VceTests provides valid Oracle 1Z0-071 exam dumps that are verified by expert IT professionals. We have Oracle Database 12c SQL 1Z0-071 real exam questions of Oracle Database 12c with verified answers that can be of great help for students looking for Oracle Database 12c SQL questions answers. Get best preparation study material for 1Z0-071 with latest practice test question from VceTests. https://www.vcetests.com/1Z0-071-vce.html