This post is also available in:
![]() Português
Português
Those days, I was working on a customer that had several Oracle IDCS providers. Two of them for Oracle Cloud at Customer different appliances and one Oracle Cloud Infrastrucure account. There was a requirement to consolidate all users authentication flow on a single IDCS, so there was no need of keeping them all synced across multiple IDCS’s. Also, if someone left the company, blocking the user in one single centralised place was a requirement. Moreover, the passwords and their policies would be consolidated making it much more easier for management.
So as I couldn’t find anything over the internet, I’ve decided to write this article showing step by step of how to perform it using SAML. To simplify, I will only work with 2 IDCS systems here. Extending to a third is straight–forward.
I will call those systems:
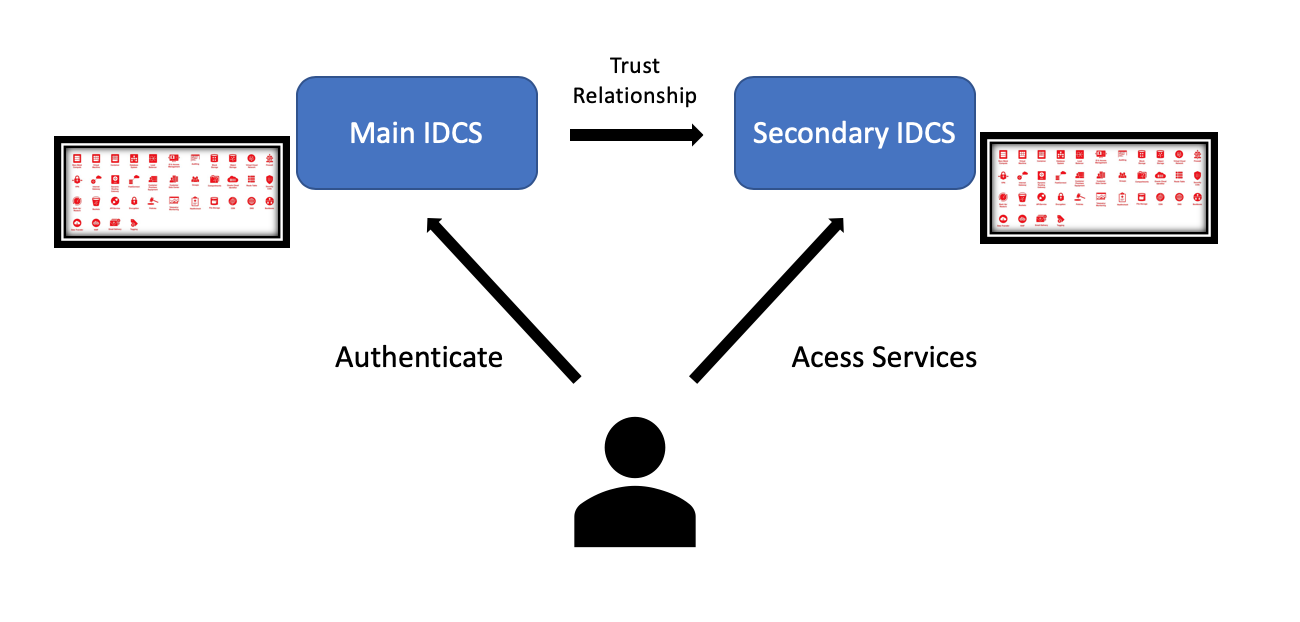
- IDCS_Main – This is the IDCS that we want to centralize our users and make it the main identity provider authentication place.
- IDCS_Sec – This is the IDCS location have the services we want to access, but will redirect login authentication to IDCS_Main.
So basically the scenario is:
Let’s start the setup!
Overall steps:
- Create SAML App on IDCS_Main
- Add Identity Provider on IDCS_Sec
- Finish SAML App configuration on IDCS_Main
- Test and enable the Identity Provider on IDCS_Sec
- Add the Identity Provider to the Default Identity Provider Policy
Create SAML App on IDCS_Main
First, connect on your IDCS_Main and create a new SAML Application to enable this trust relationship between the IDCS’s.
Go to your IDCS -> Application -> Add -> SAML Application
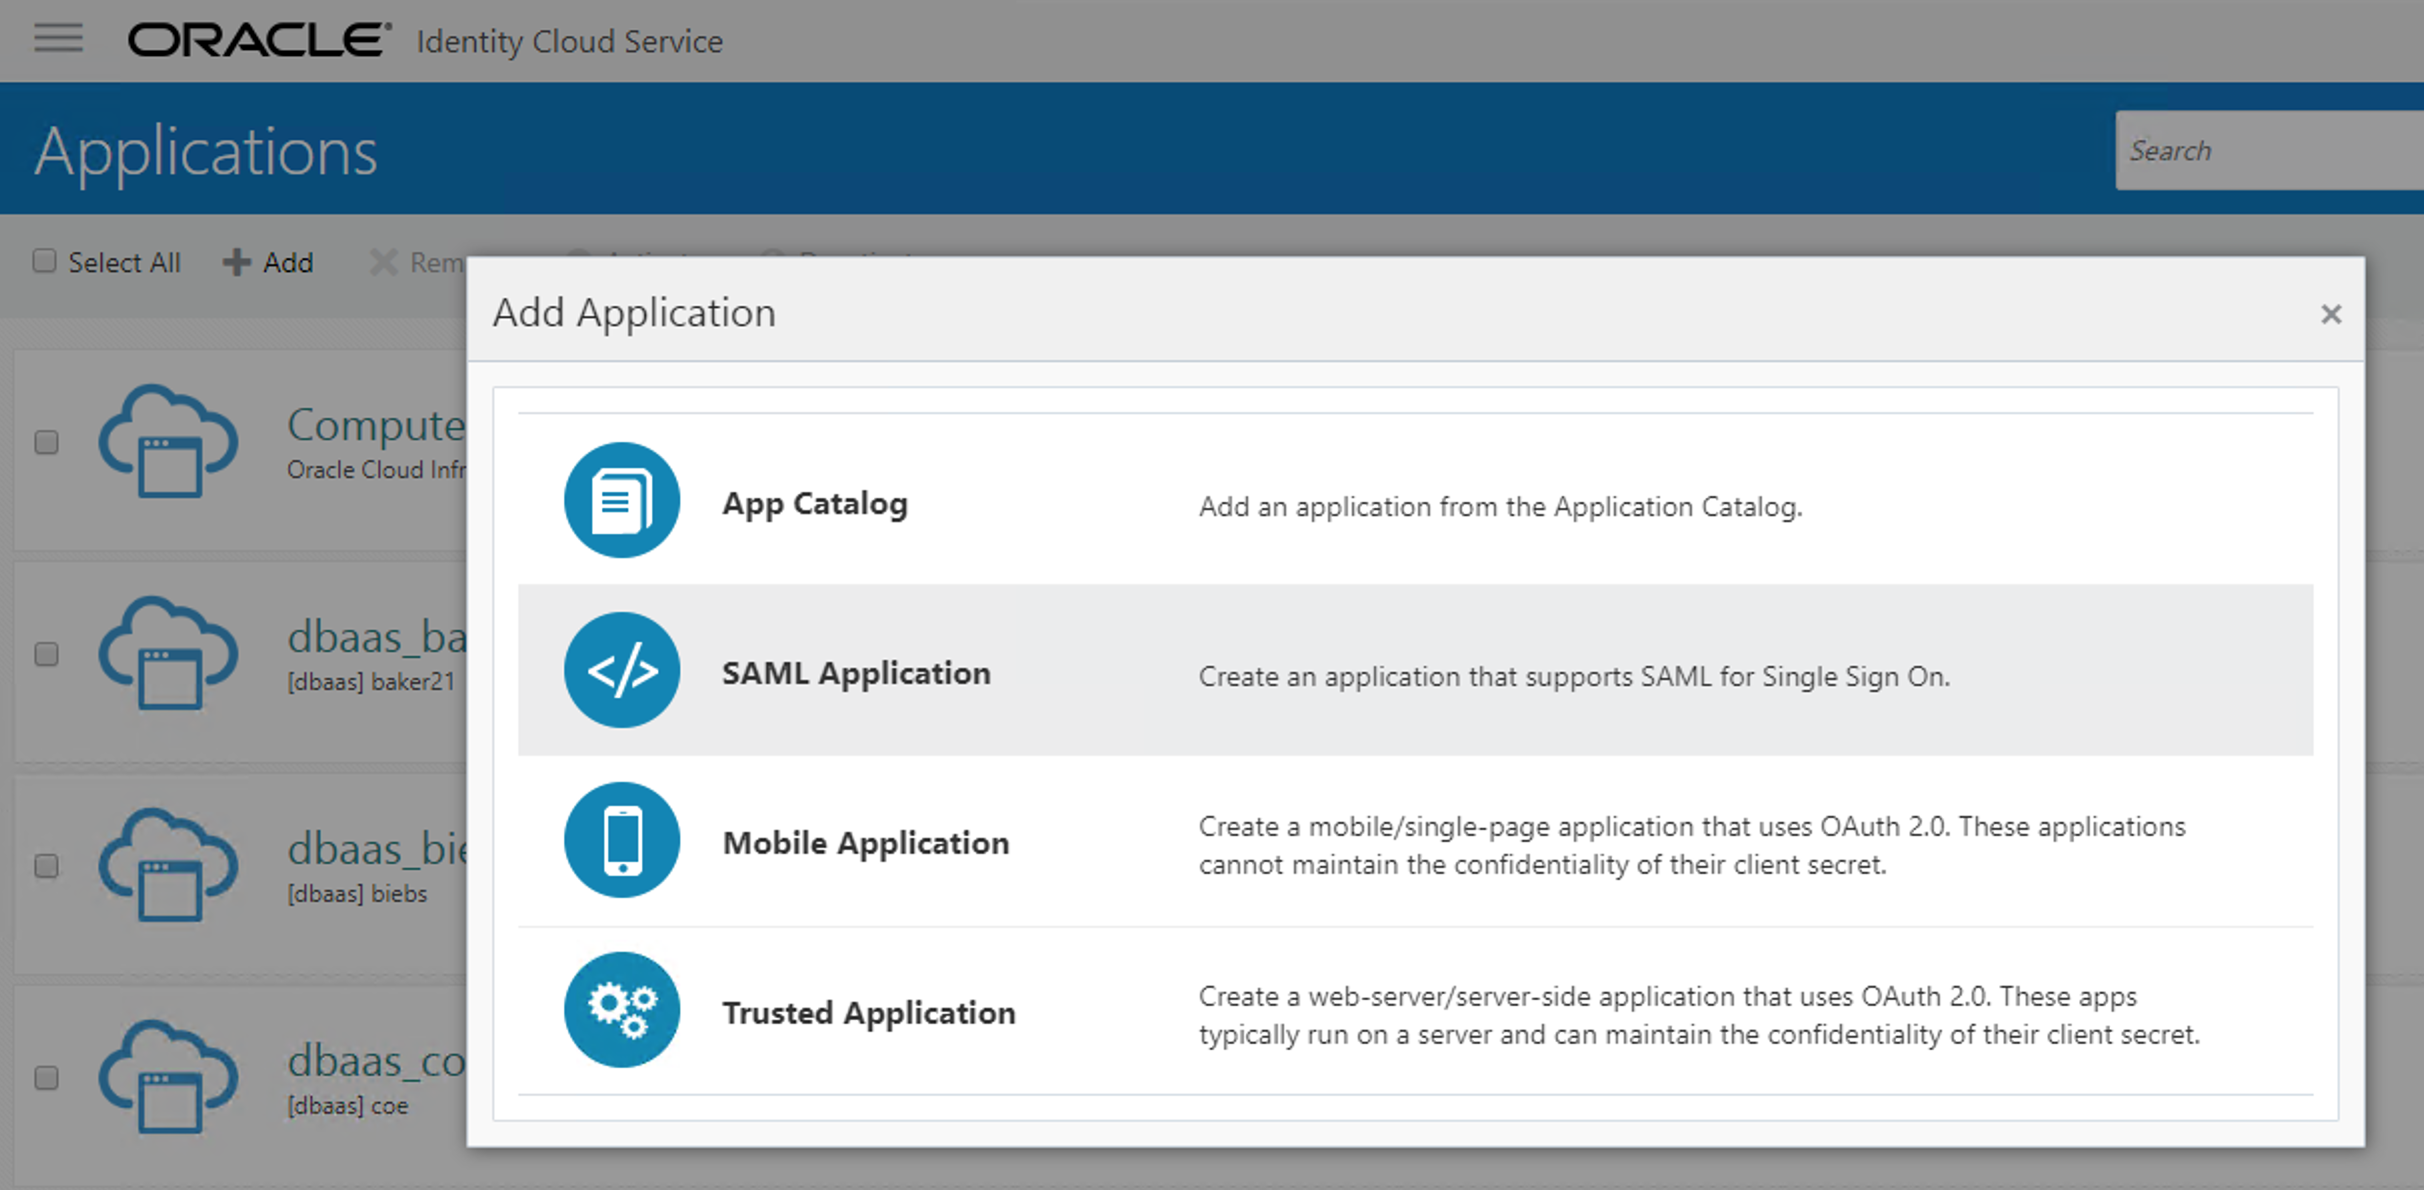
Now give the SAML Application a Name and a Description explaining it will be used for authentications coming from IDCS_Sec. Click Next:

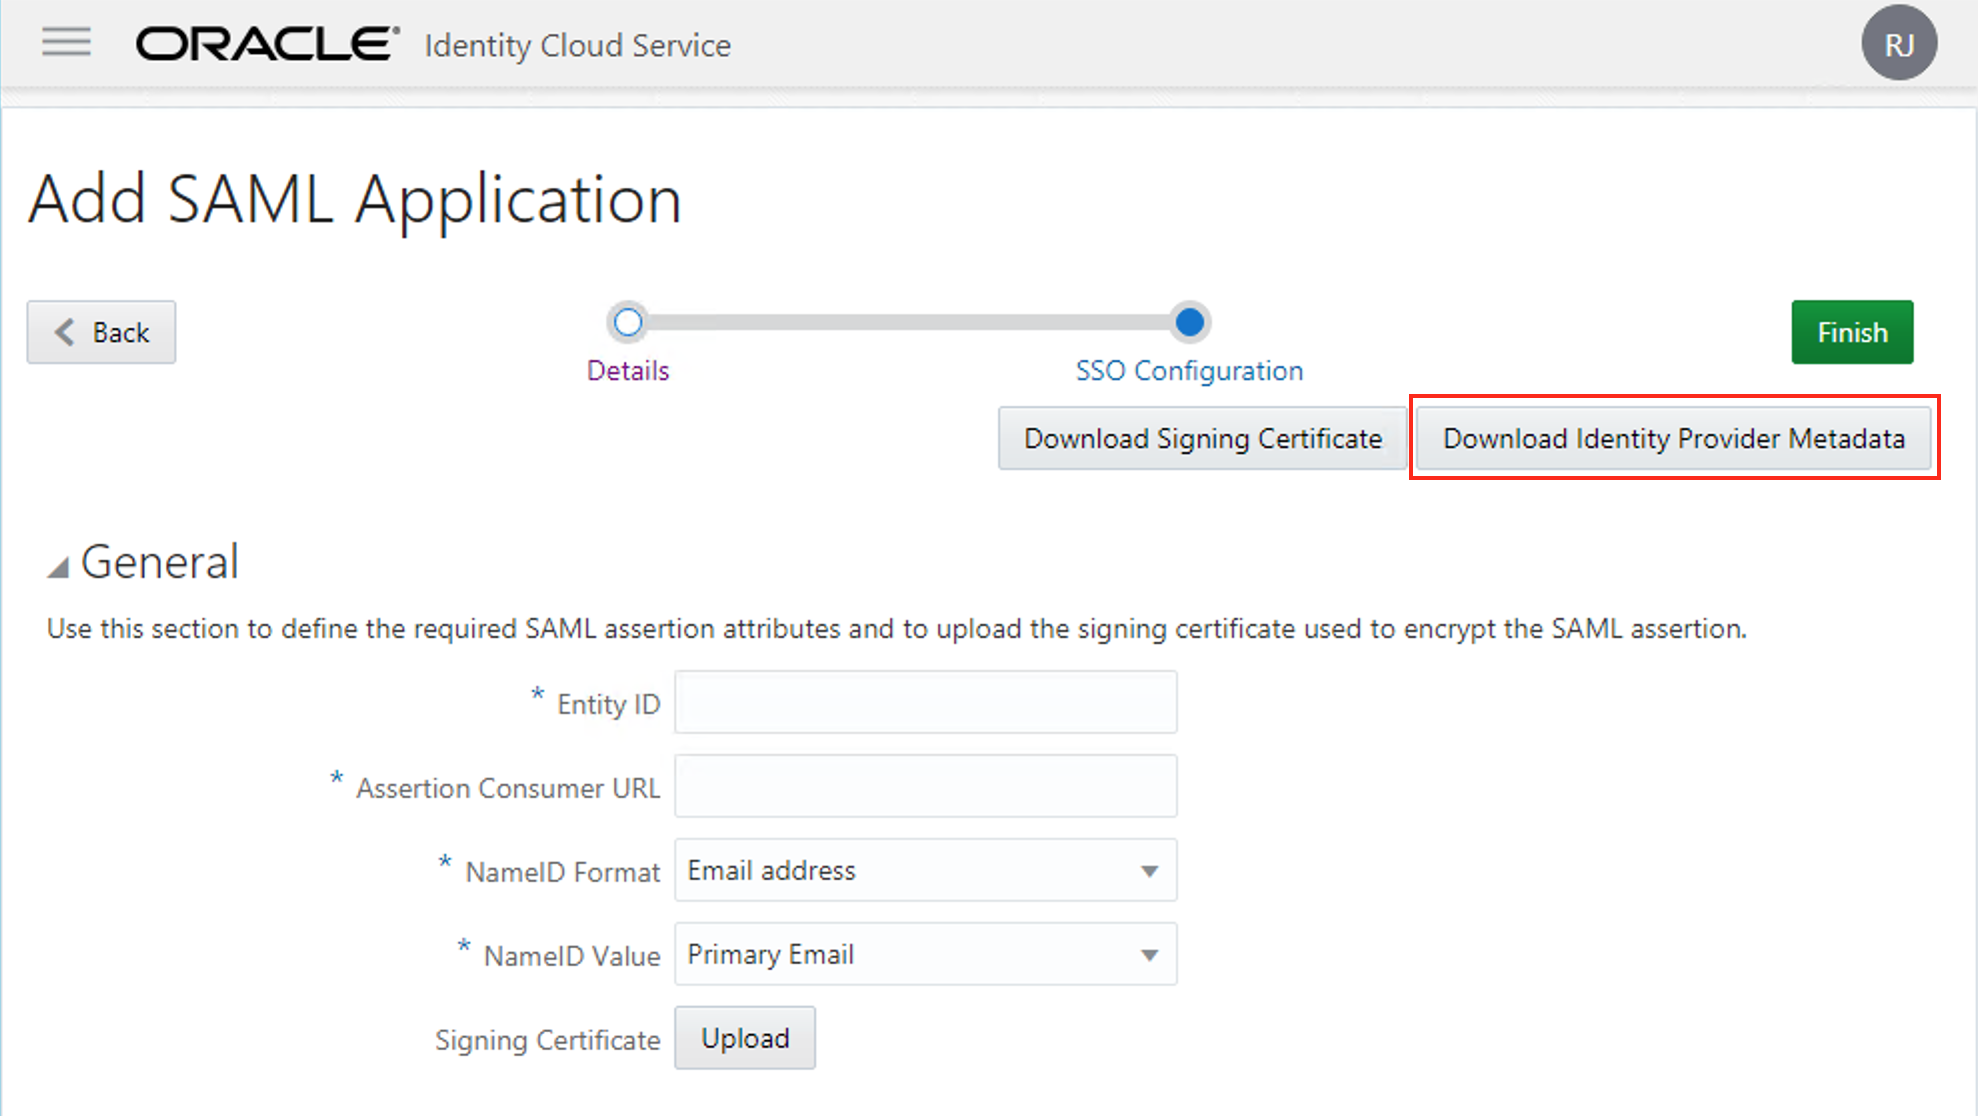
On the Next screen, we will stop for a moment on IDCS_Main and start working on IDCS_Sec. But before jumping to the other, click on “Download Identity Provider Metadata” button. We will need this to upload on IDCS_Sec later.
Add Identity Provider on IDCS_Sec
Now connect on IDCS_Sec. Go to “IDCS -> Security -> Identity Providers” and “Add SAML IDP” button.
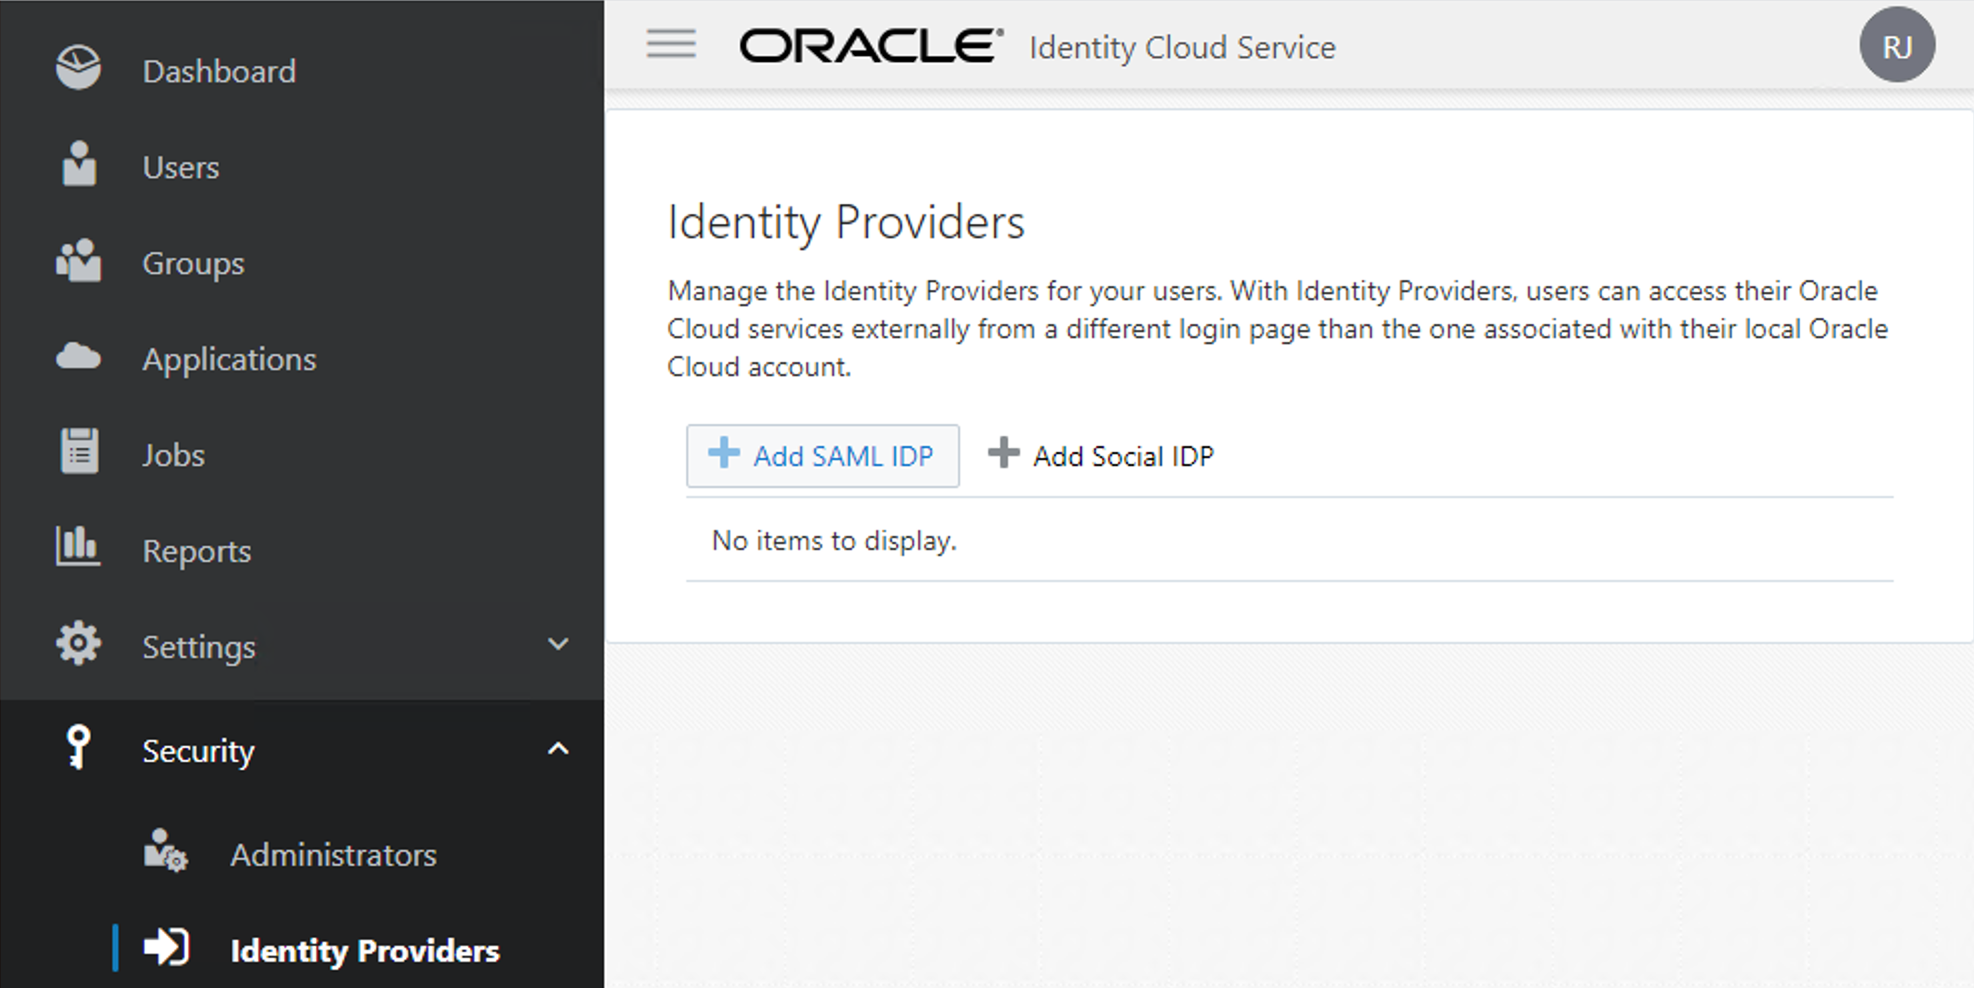
Now give the IDP a Name and a Description. Optionally you can also add an icon. This name will be shown on the authentication page when you choose to authenticate using the Main IDCS. Click Next.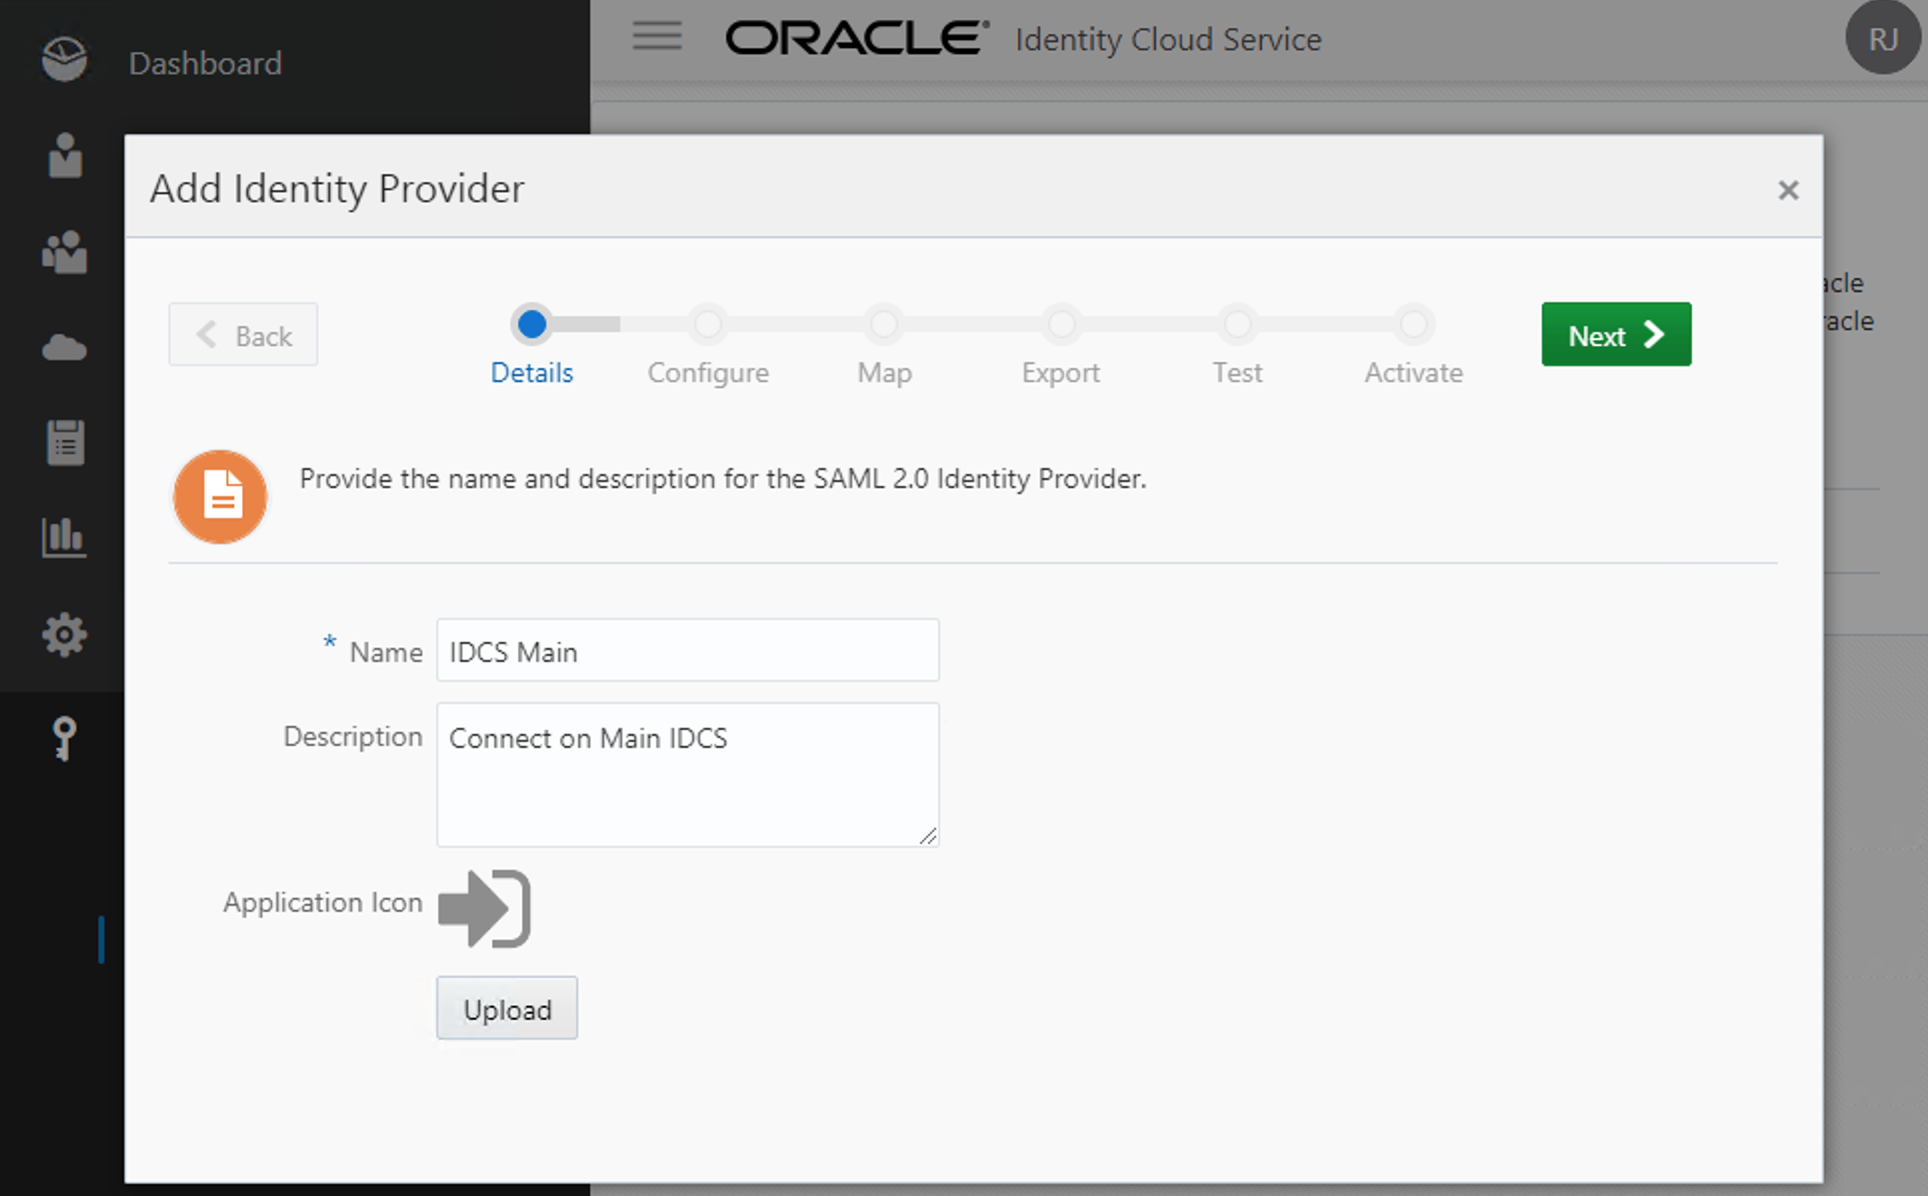
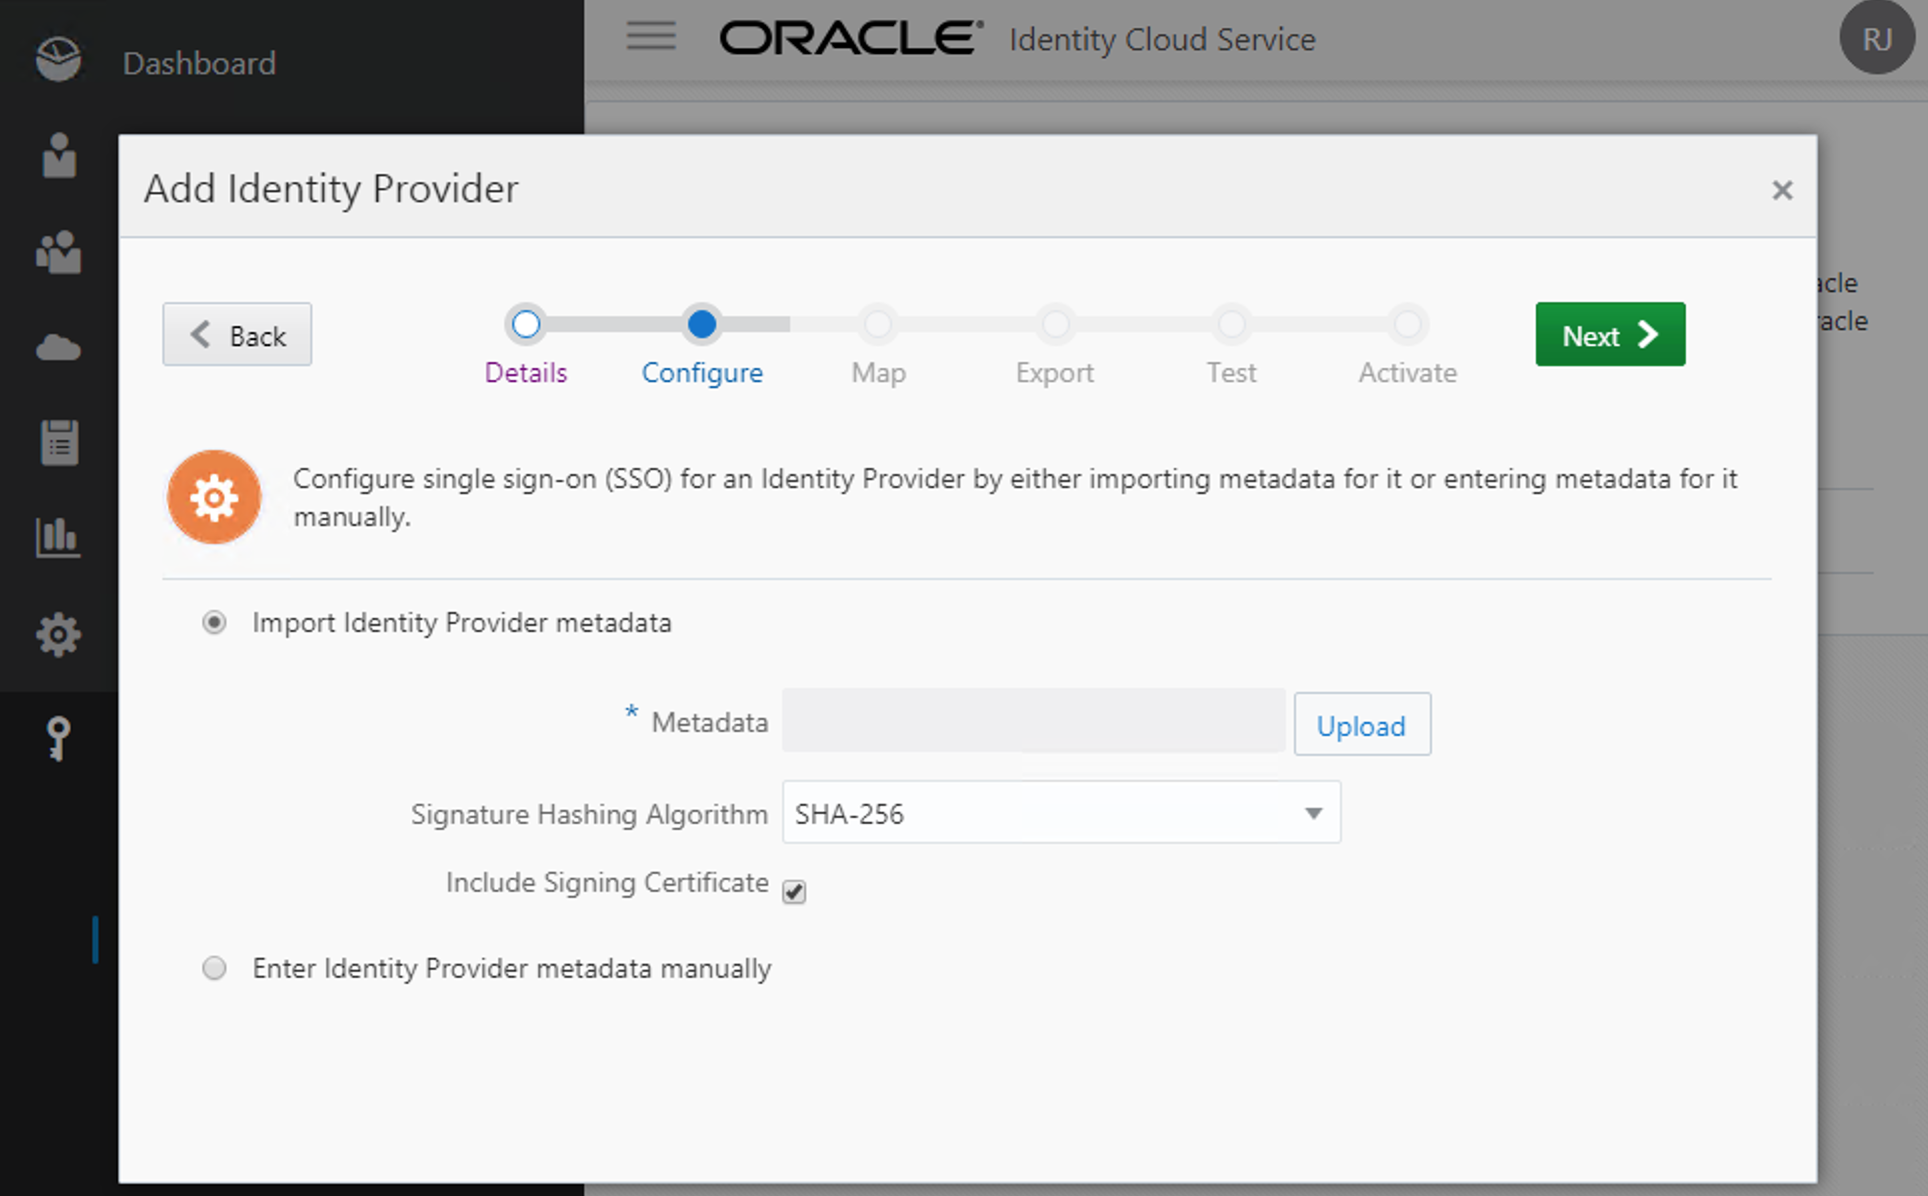
Now select “Import Identity Provider metadata” and choose the file you’ve downloaded on the previous step. Keep checked the option to “Include Signing Certificate“. Click Next.
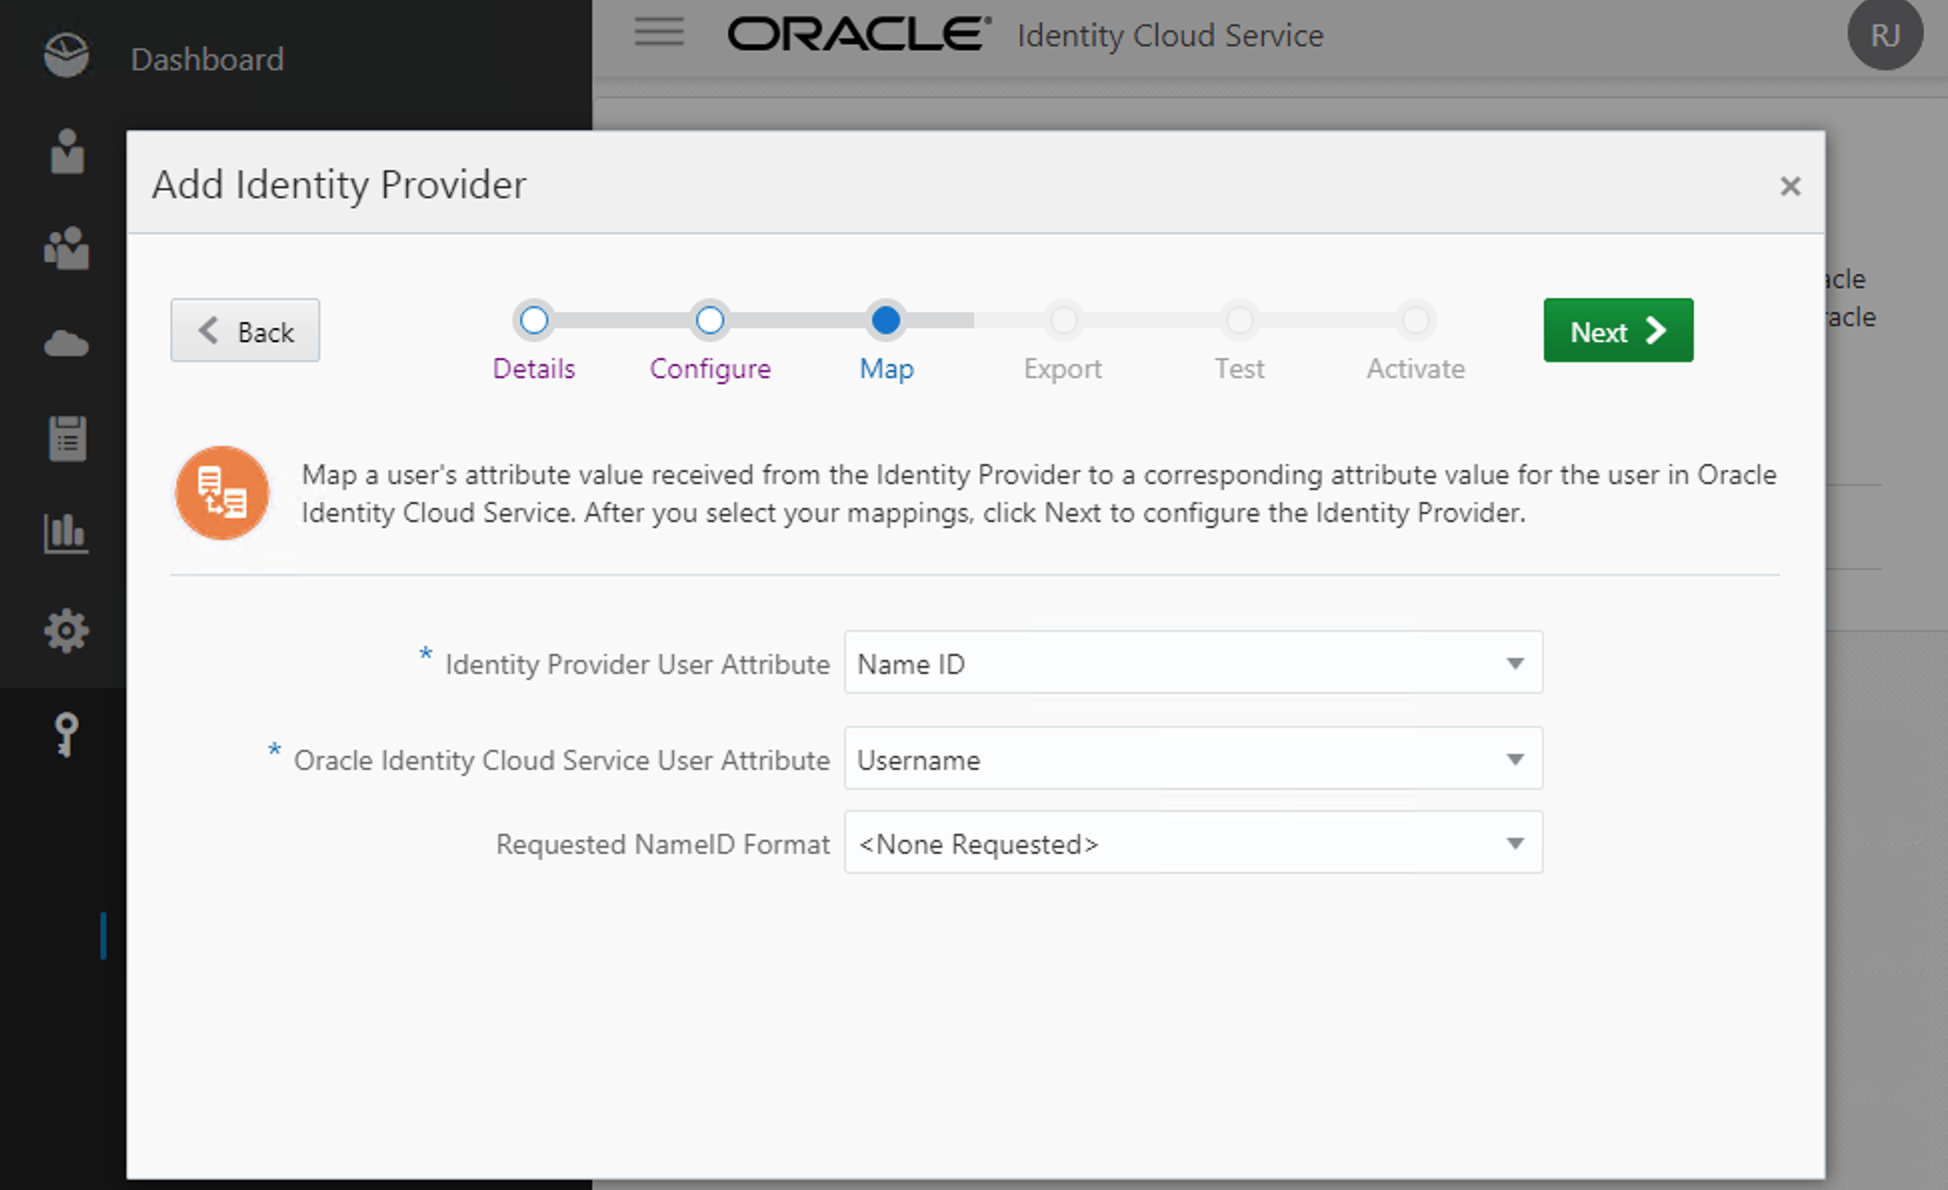
On the map section, keep the default options: Name ID / Username / <None Requested>. Click Next.
On the Export screen you will be given several info that we will need to input on the SAML Application of the IDCS_Main. Time to copy and paste data from one window to the other.
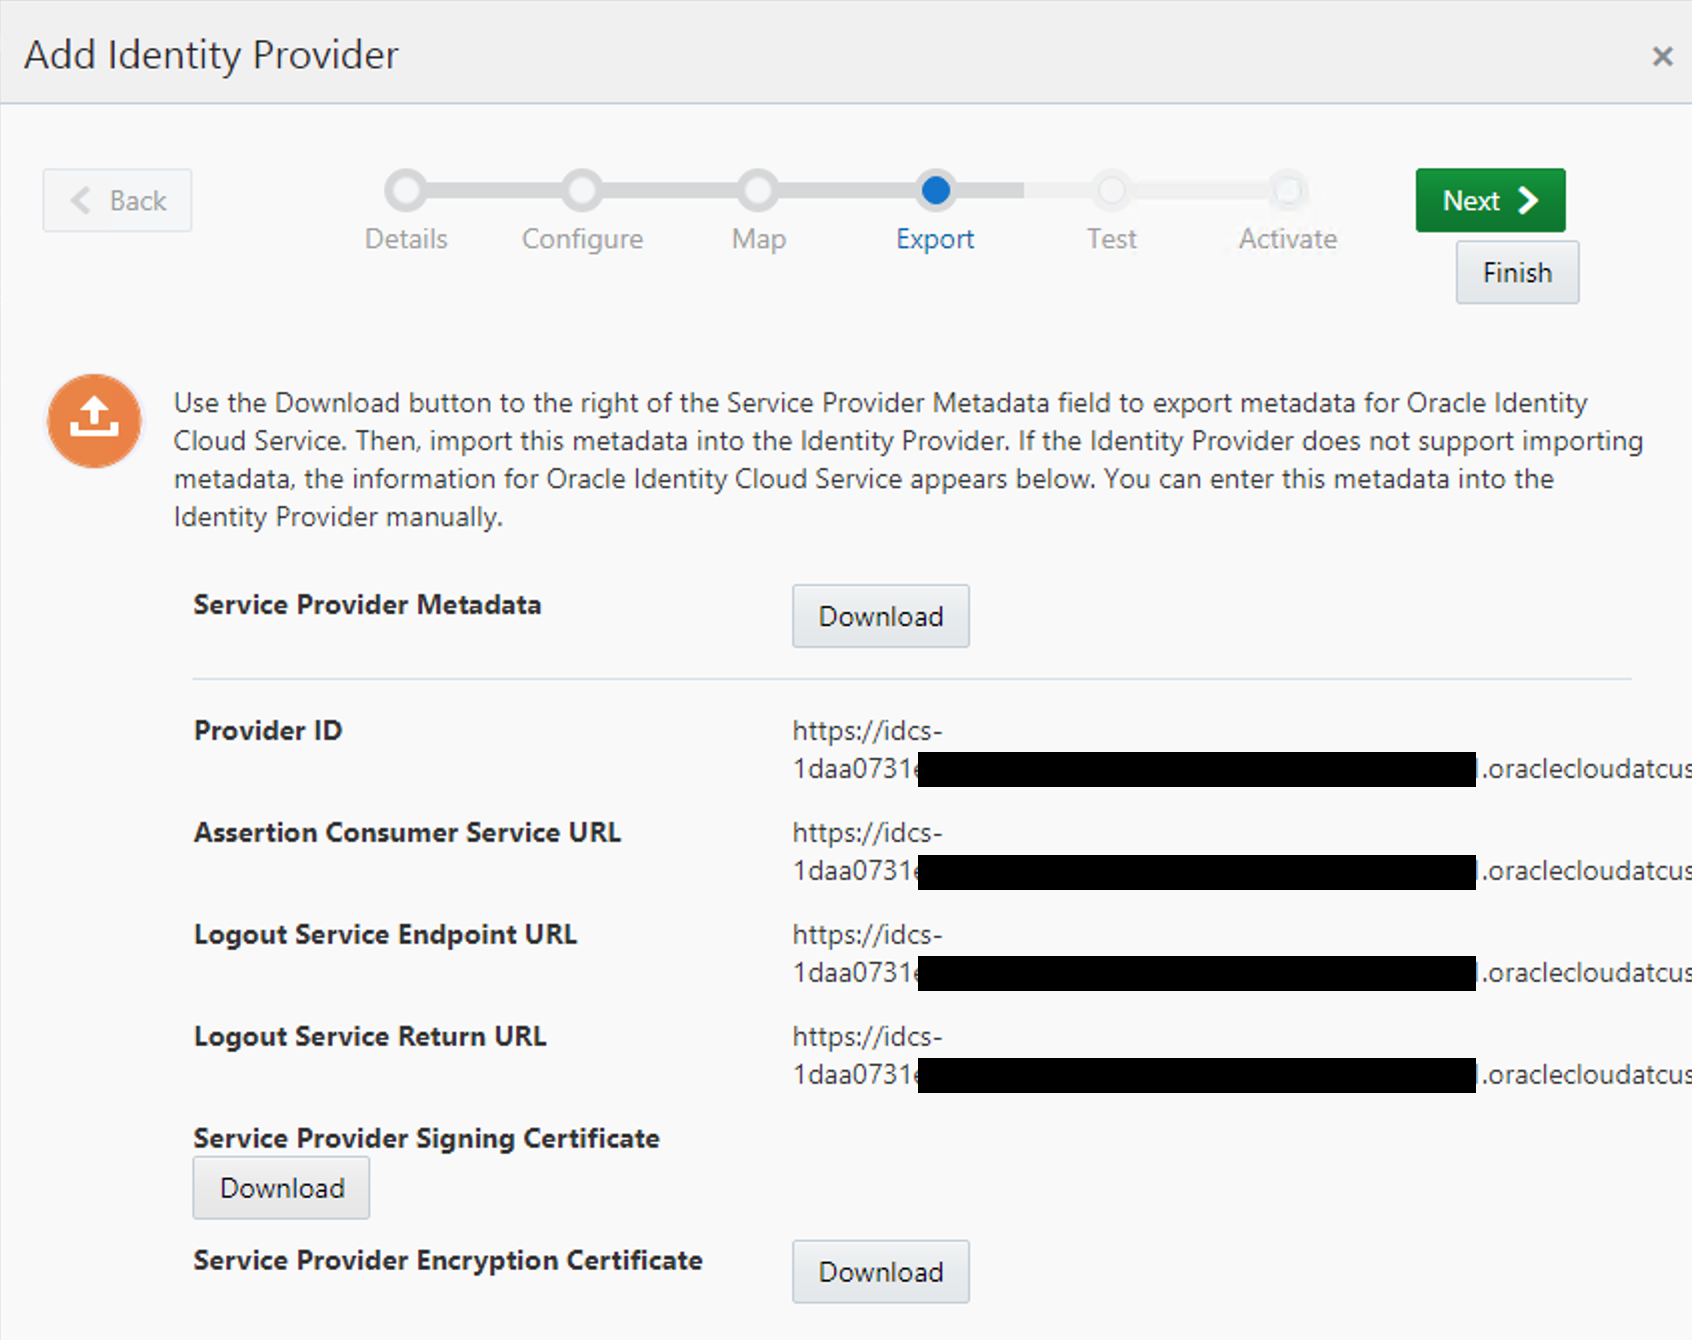
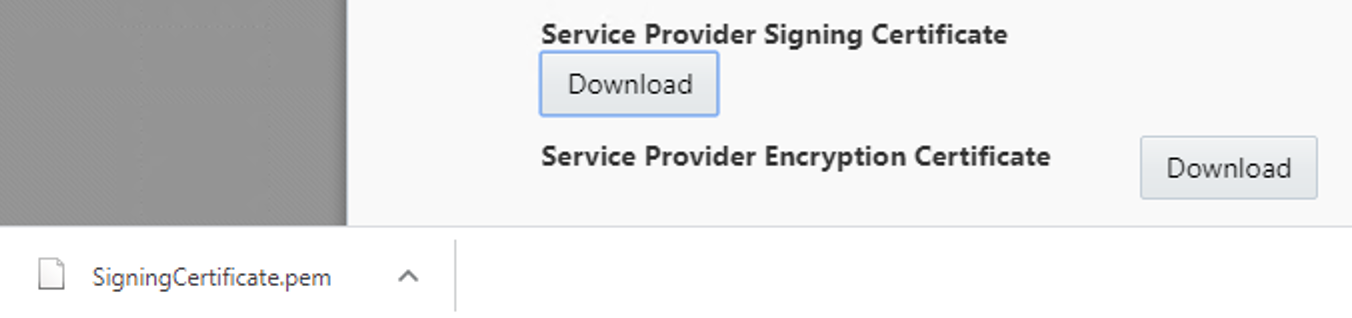
Also, download the Service Provider Signing Certificate as we will need to import it on the SAML App.
Do not confuse it with the Encryption Certificate!
Finish SAML App configuration on IDCS_Main
Go back to IDCS_Main.
- Paste on Entity ID the link from Provider ID
- Paste on Assertion Consumer URL the link from Assertion Consumer Service URL
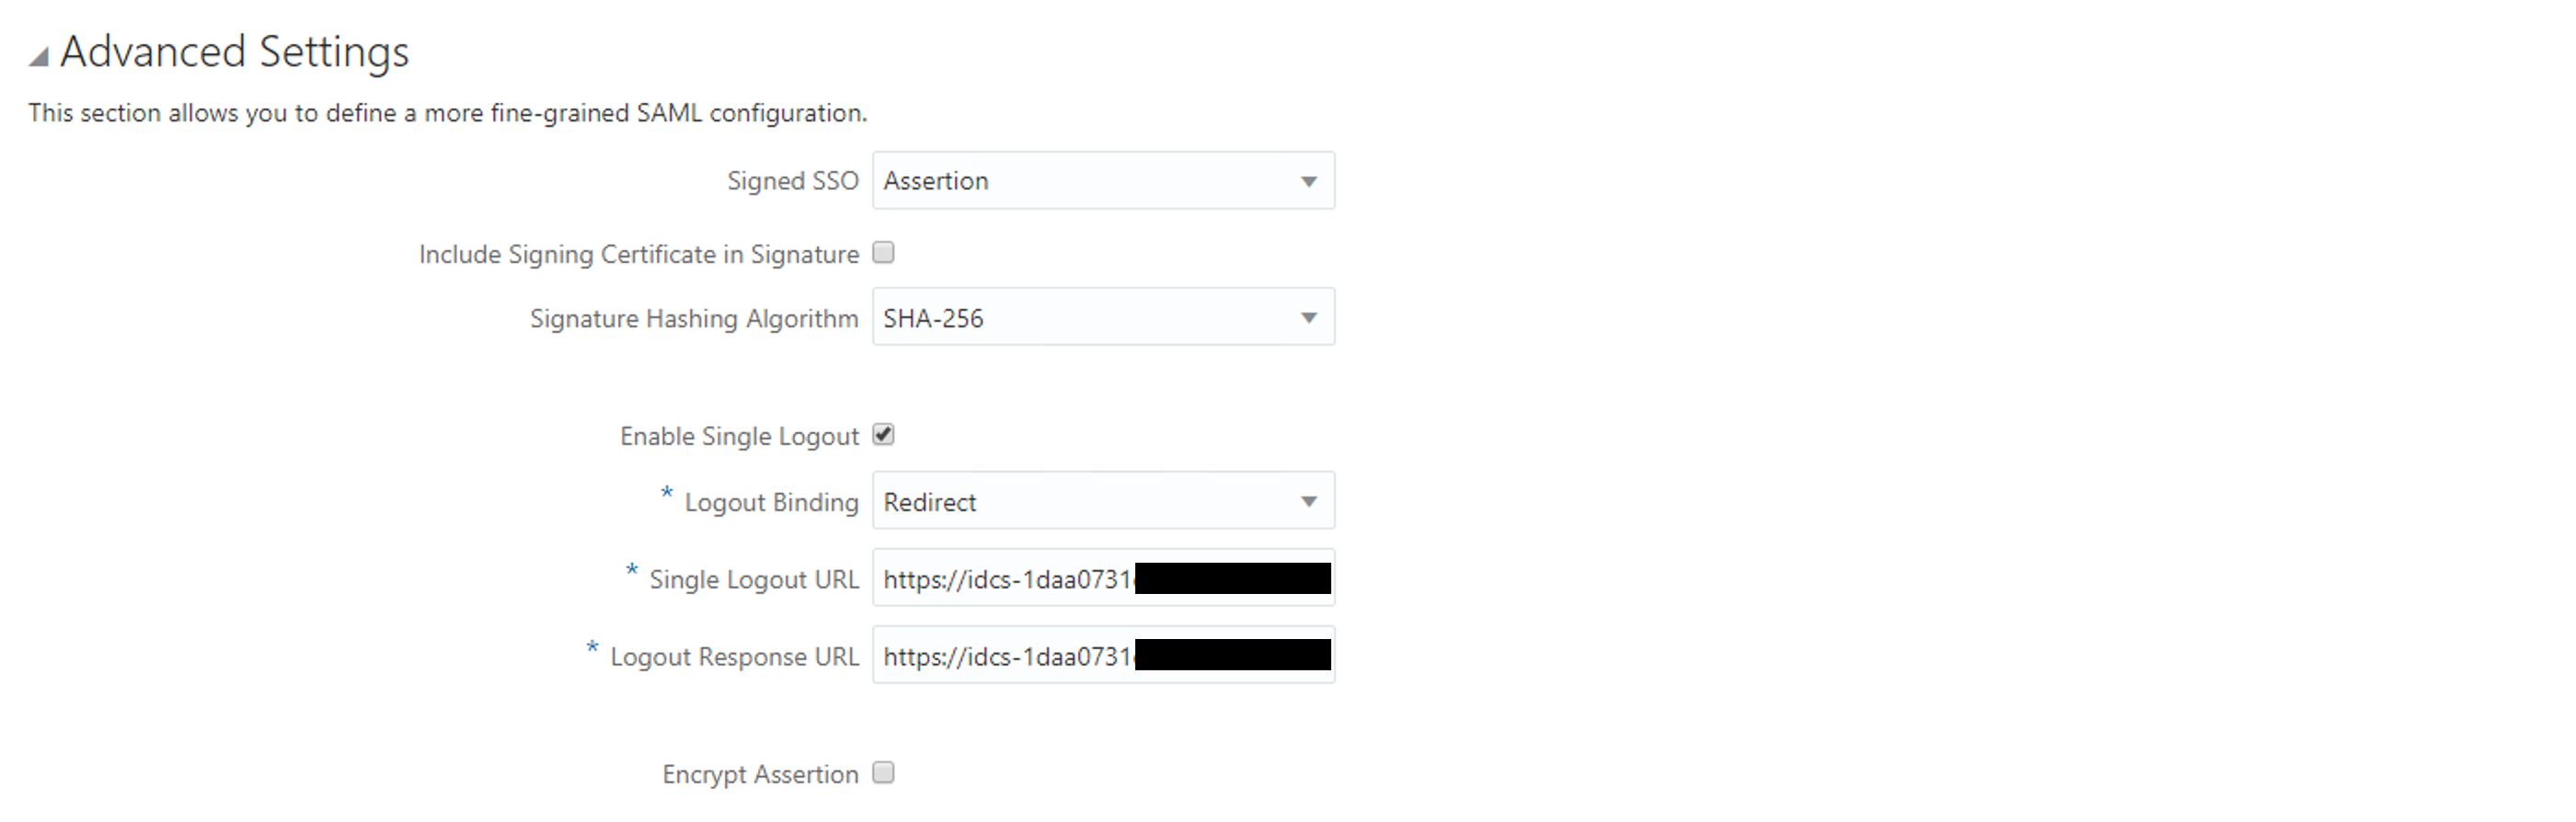
- Paste on Single Logout URL the link from Logout Service Endpoint URL (on Advanced Settings)
- Paste on Logout Response URL the link from Logout Service Return URL (on Advanced Settings)
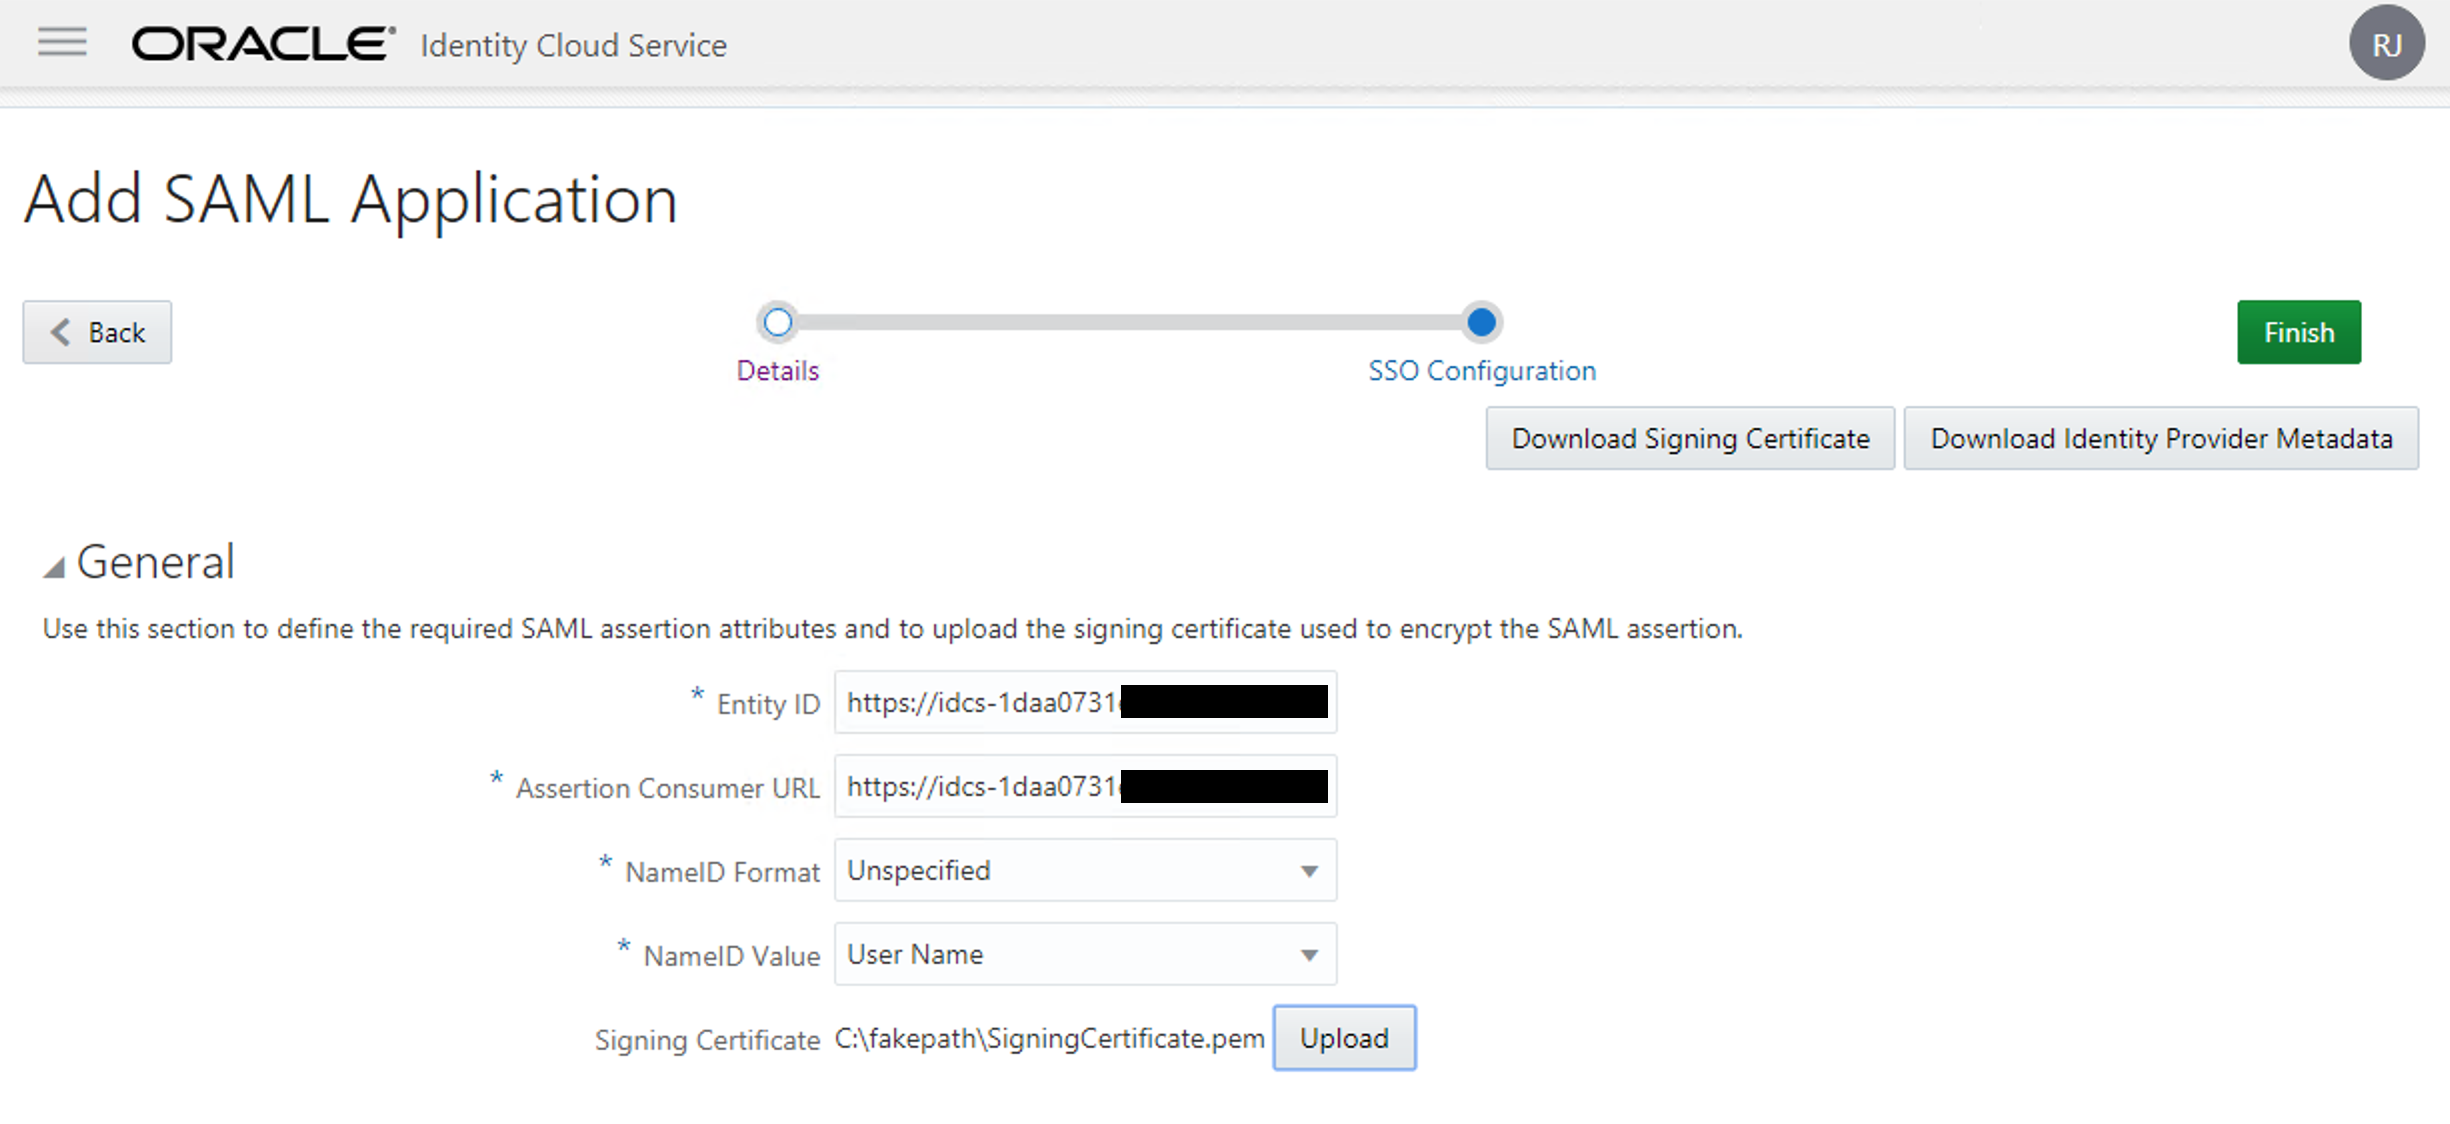
- Change NameID Format to Unspecified
- Change NameID Value to User Name.
- Upload on the “Signing Certificate” the pem file downloaded from IDCS_Sec.
You will end-up with something like this:
And on the Advanced Settings:
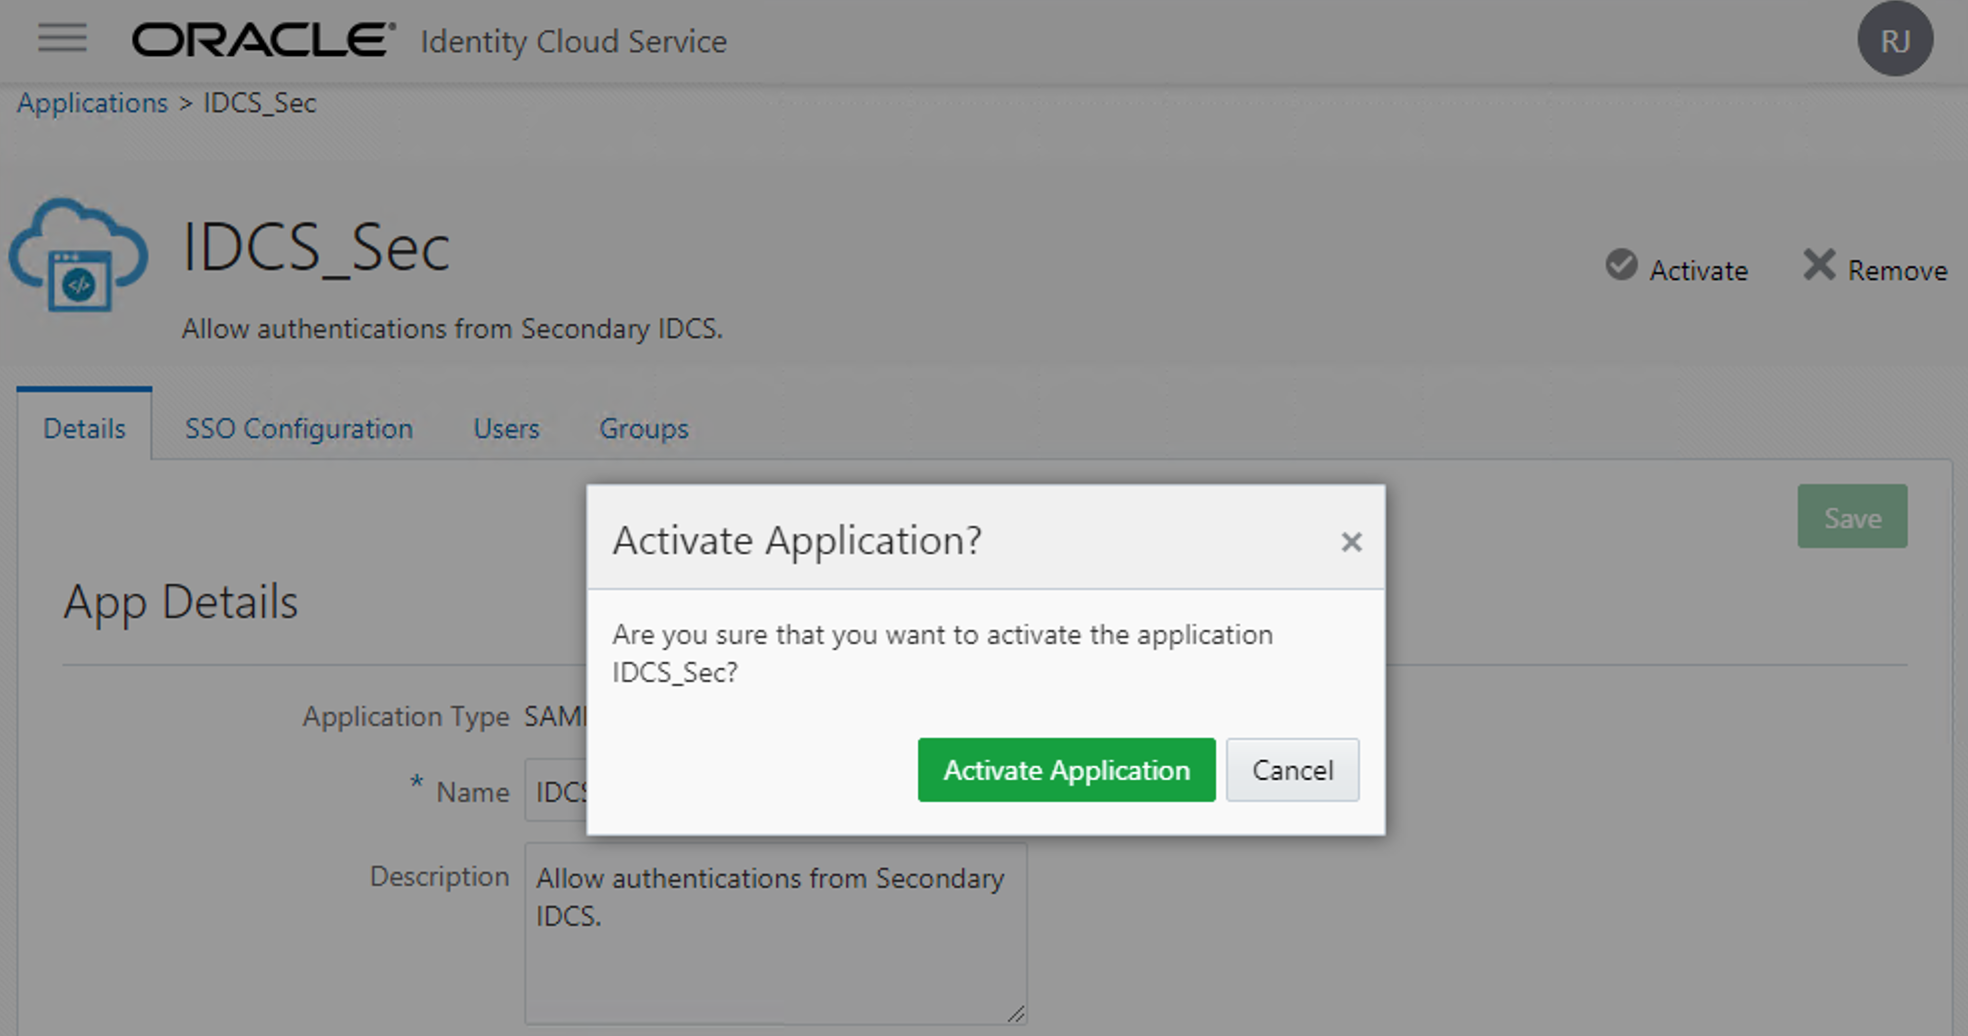
Finally press “Finish” to complete. Note that the application isn’t ready yet. You need to activate the application first and give some users or groups permissions to use it.
To enabled it, press Activate button and confirm.
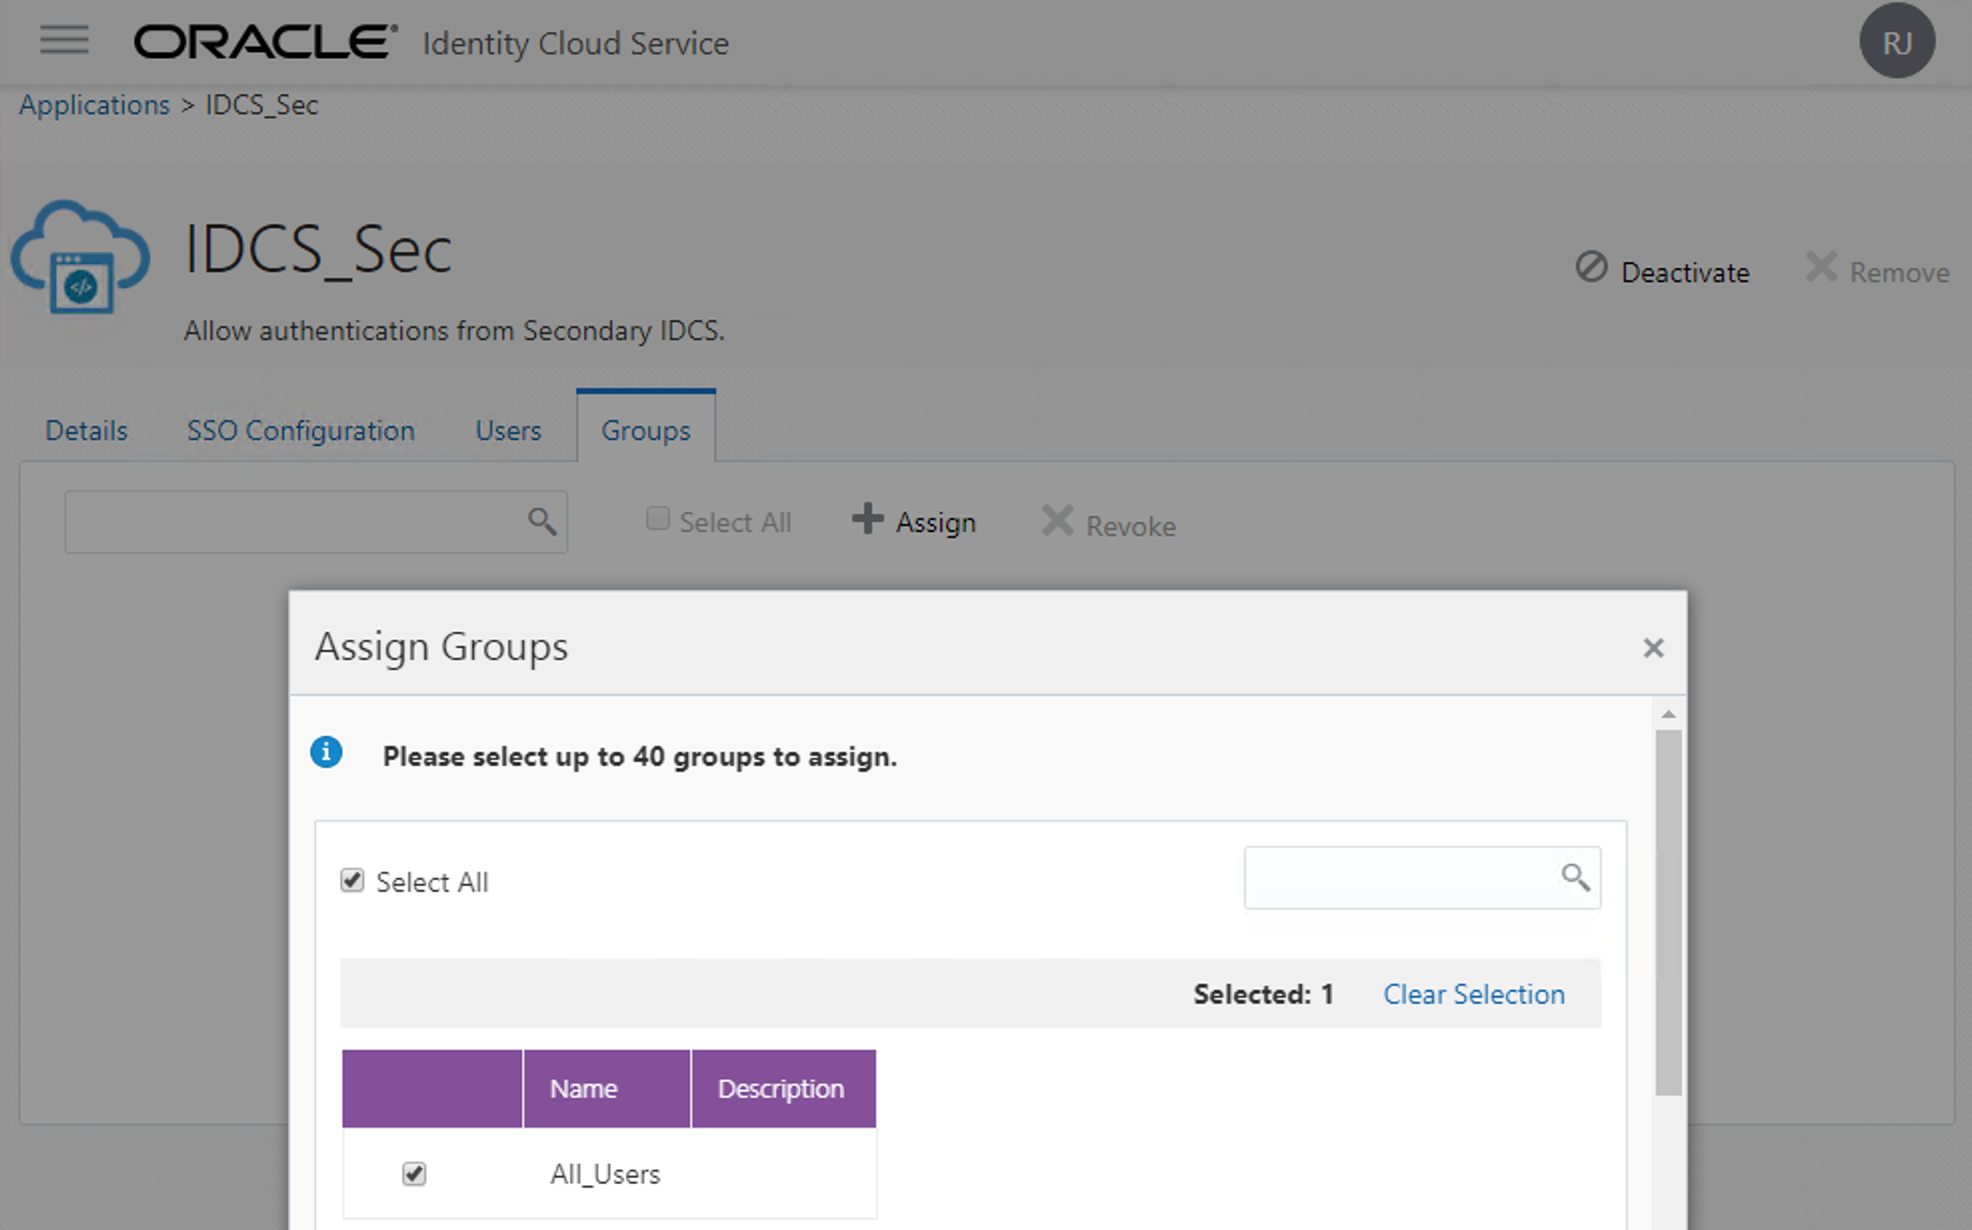
Now go to the Groups (or Users) tabs and grant access to it to whoever you want to be able to use the IDCS_Main as the identity provider of IDCS_Sec. On most cases, you will allow it to all users. If you have a group for everyone, this will make this step easier:
Test and enable the Identity Provider on IDCS_Sec
Now let’s go back to IDCS_Sec. No more tasks on IDCS_Main.
Time to test if everything is working!
We stopped on the “Export” item of the IDP flow. Click Next to move to the Test item, and click on “Test Login“.
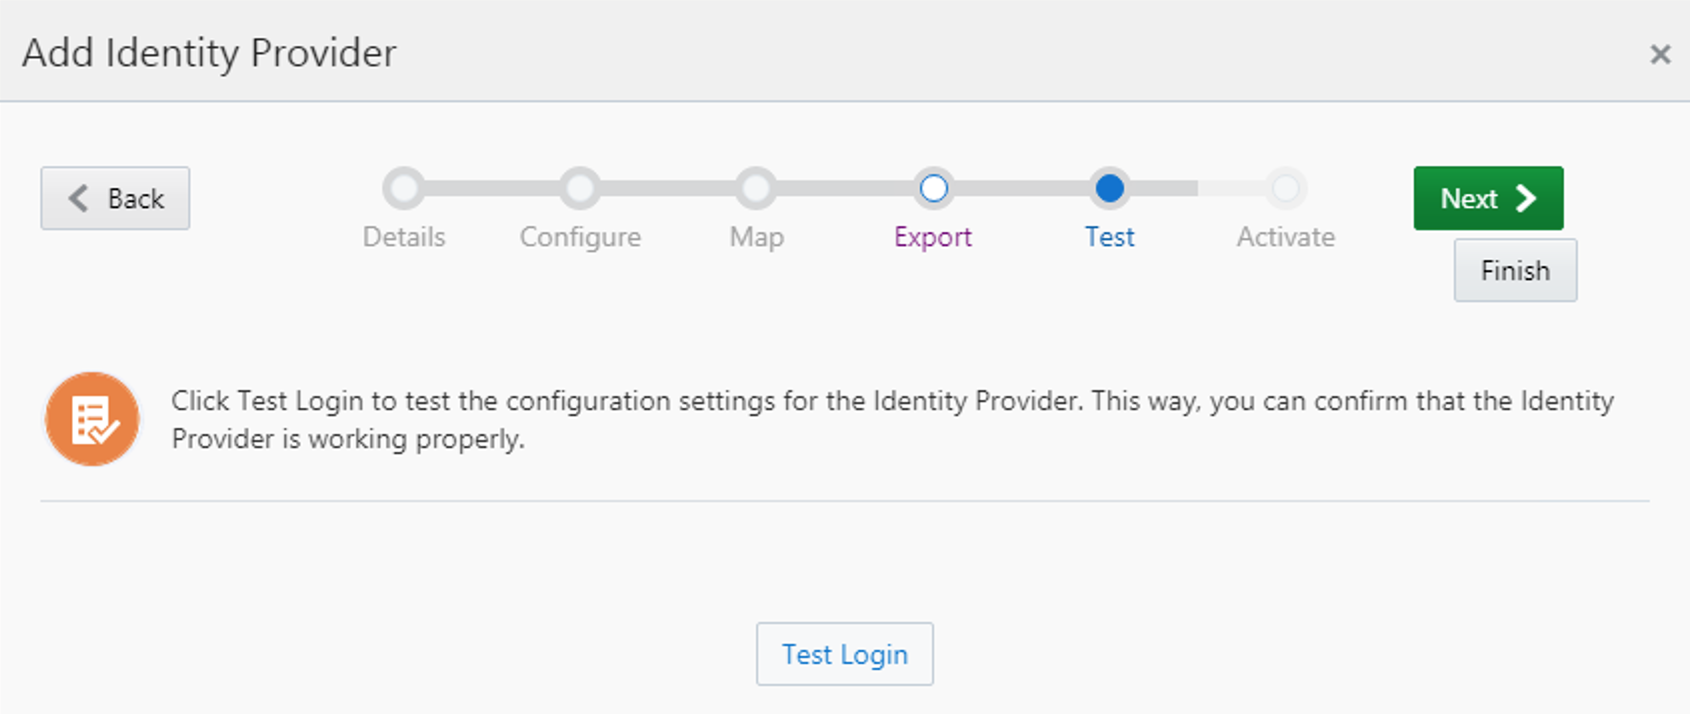
You may see something like this. If you see any error, double check the previous steps.

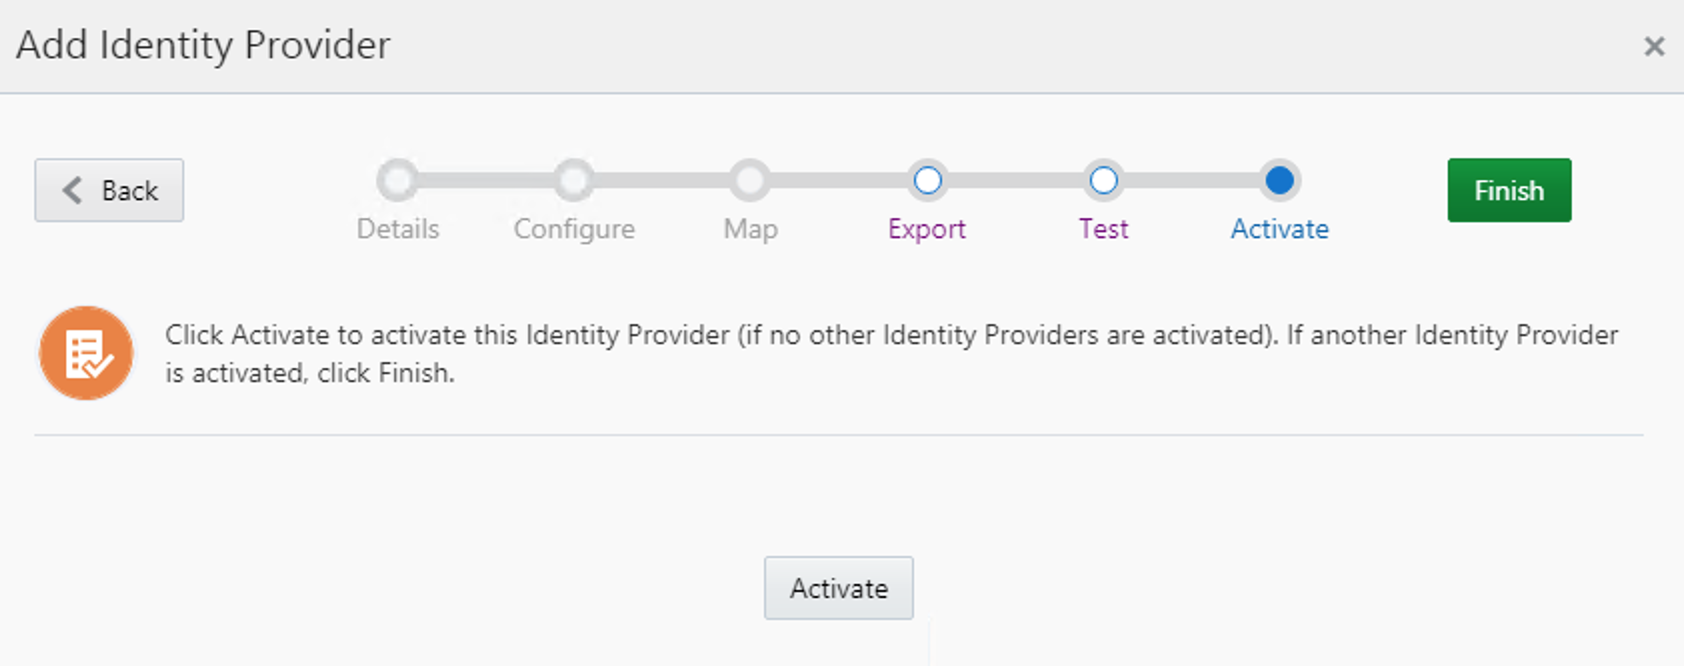
Go back to the IDP Flow. Click Next. Activate it and Finish!
Add the Identity Provider to the Default Identity Provider Policy
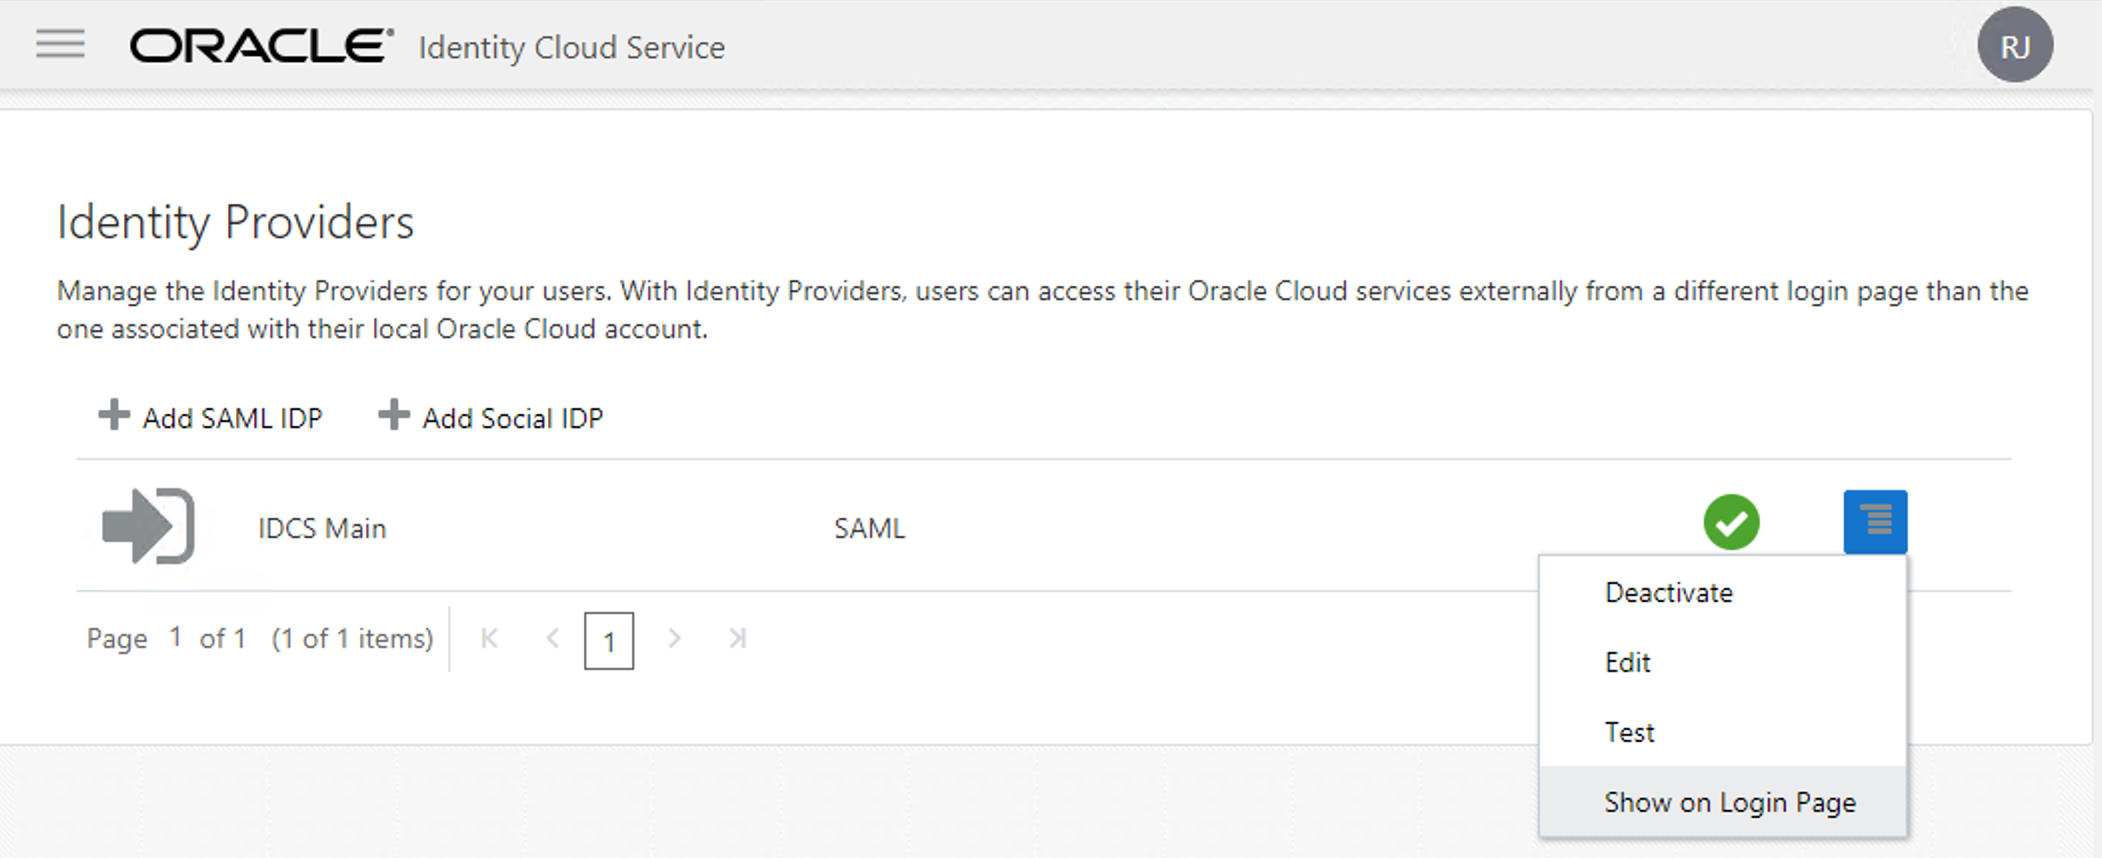
Your Identity Provider on Main IDCS is ready to authenticate your connections on the Sec IDCS! Let’s first make it visible on the Login Page.
Now to really make it appears, you need to add it as your Identity Provider Policy.
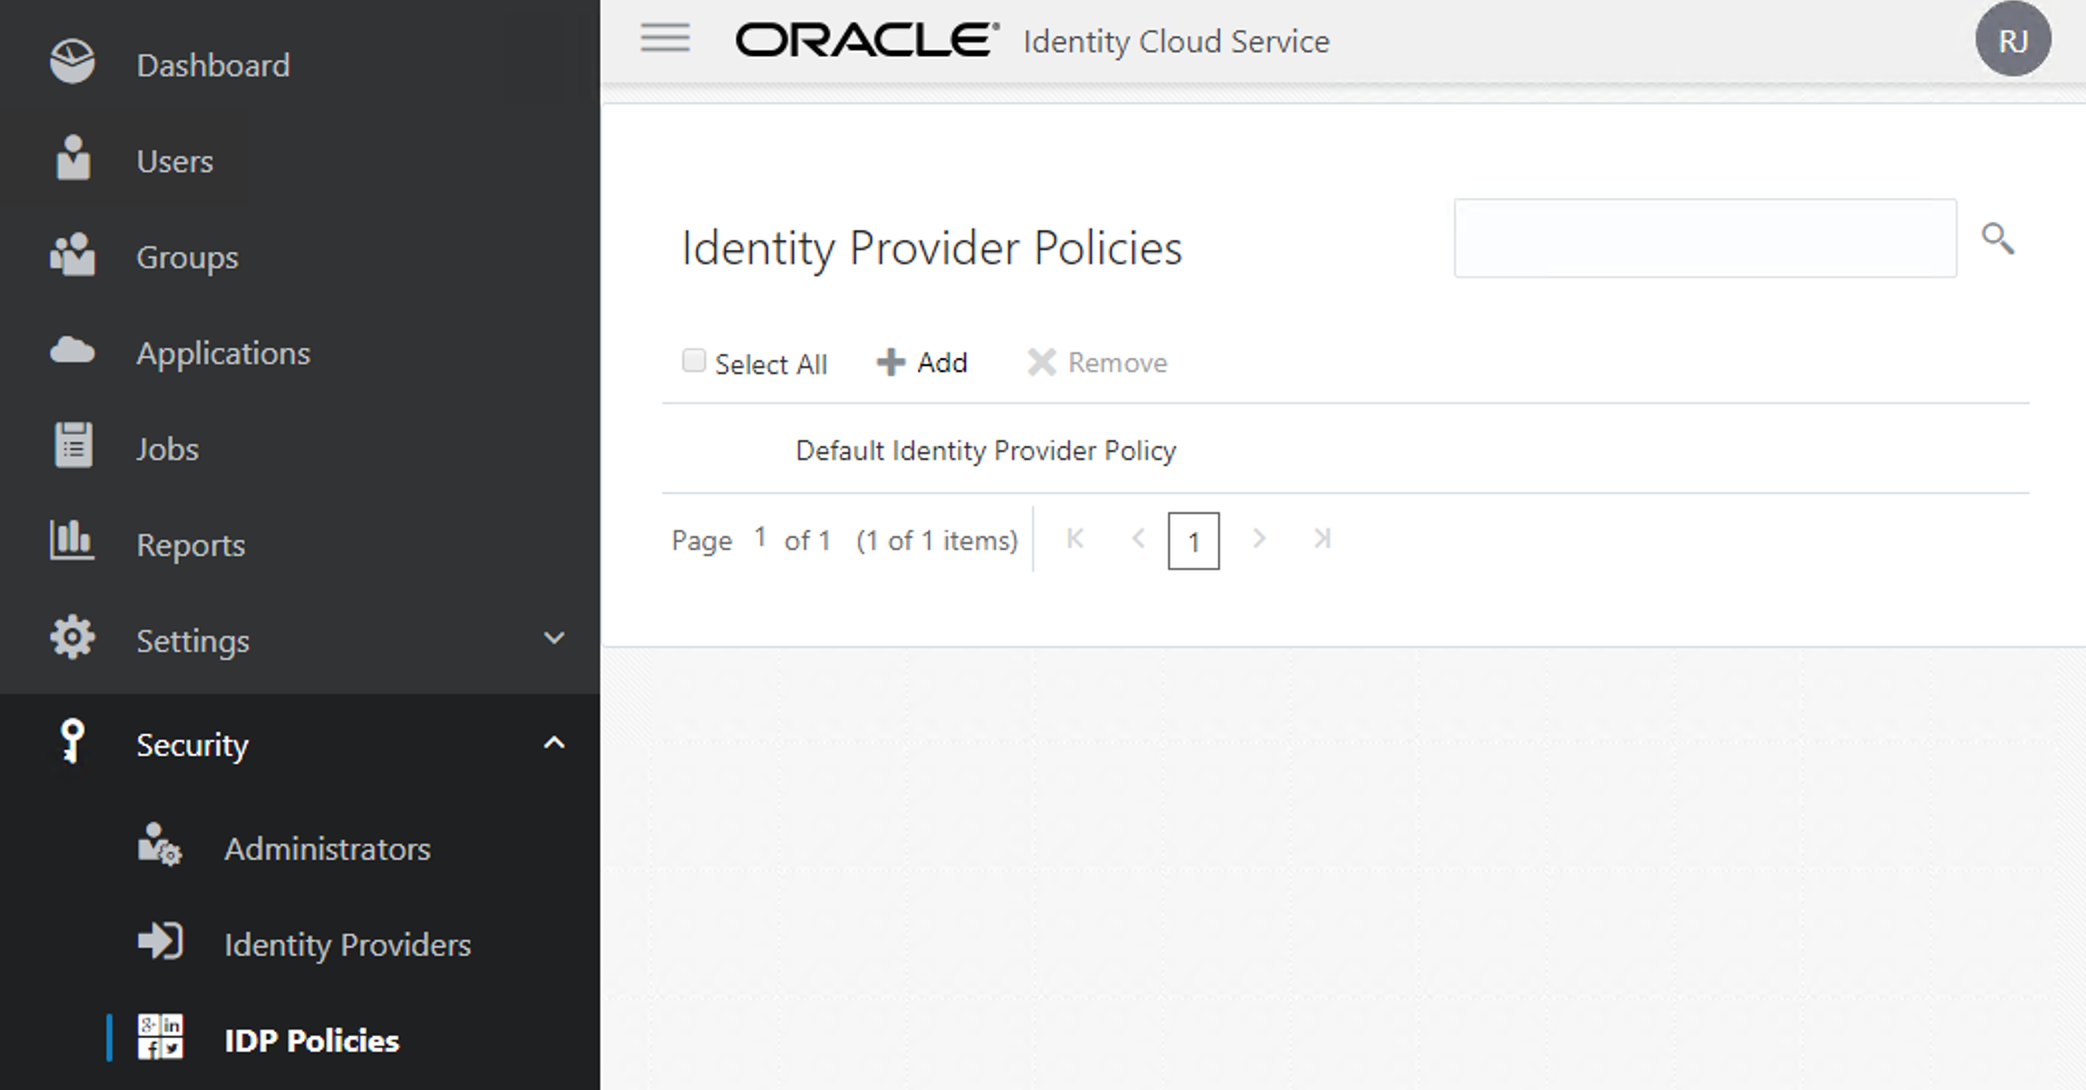
On the IDCS_Sec, go to “IDCS -> Security -> Identity Provider Policies” and click on the default one.
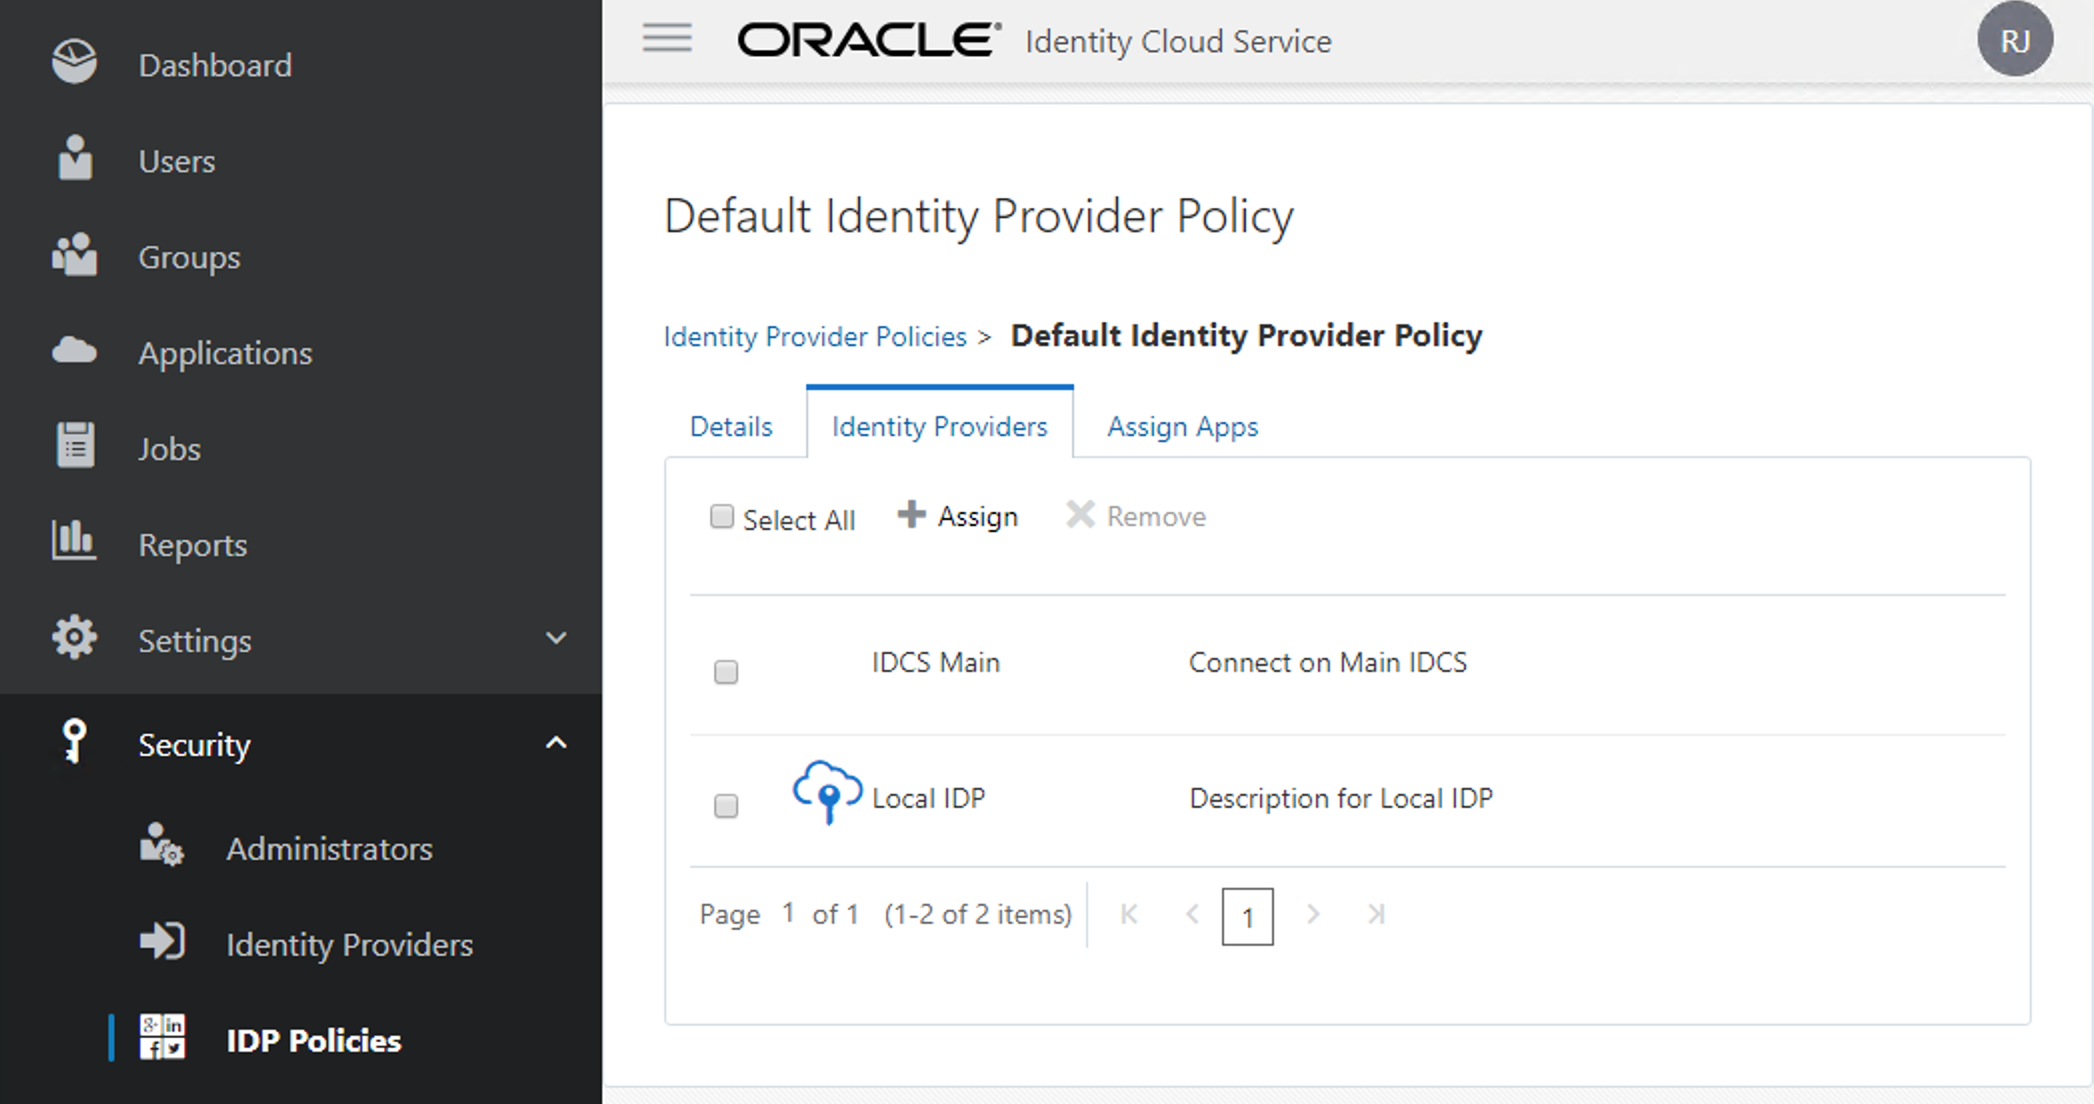
Now go to the Identity Providers tab and Assign the “IDCS Main” to your list.
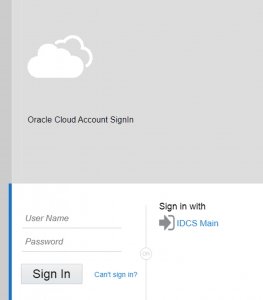
Finally, now you are able to see the new option for connection on your IDCS_Sec.
Mark Users as Federated
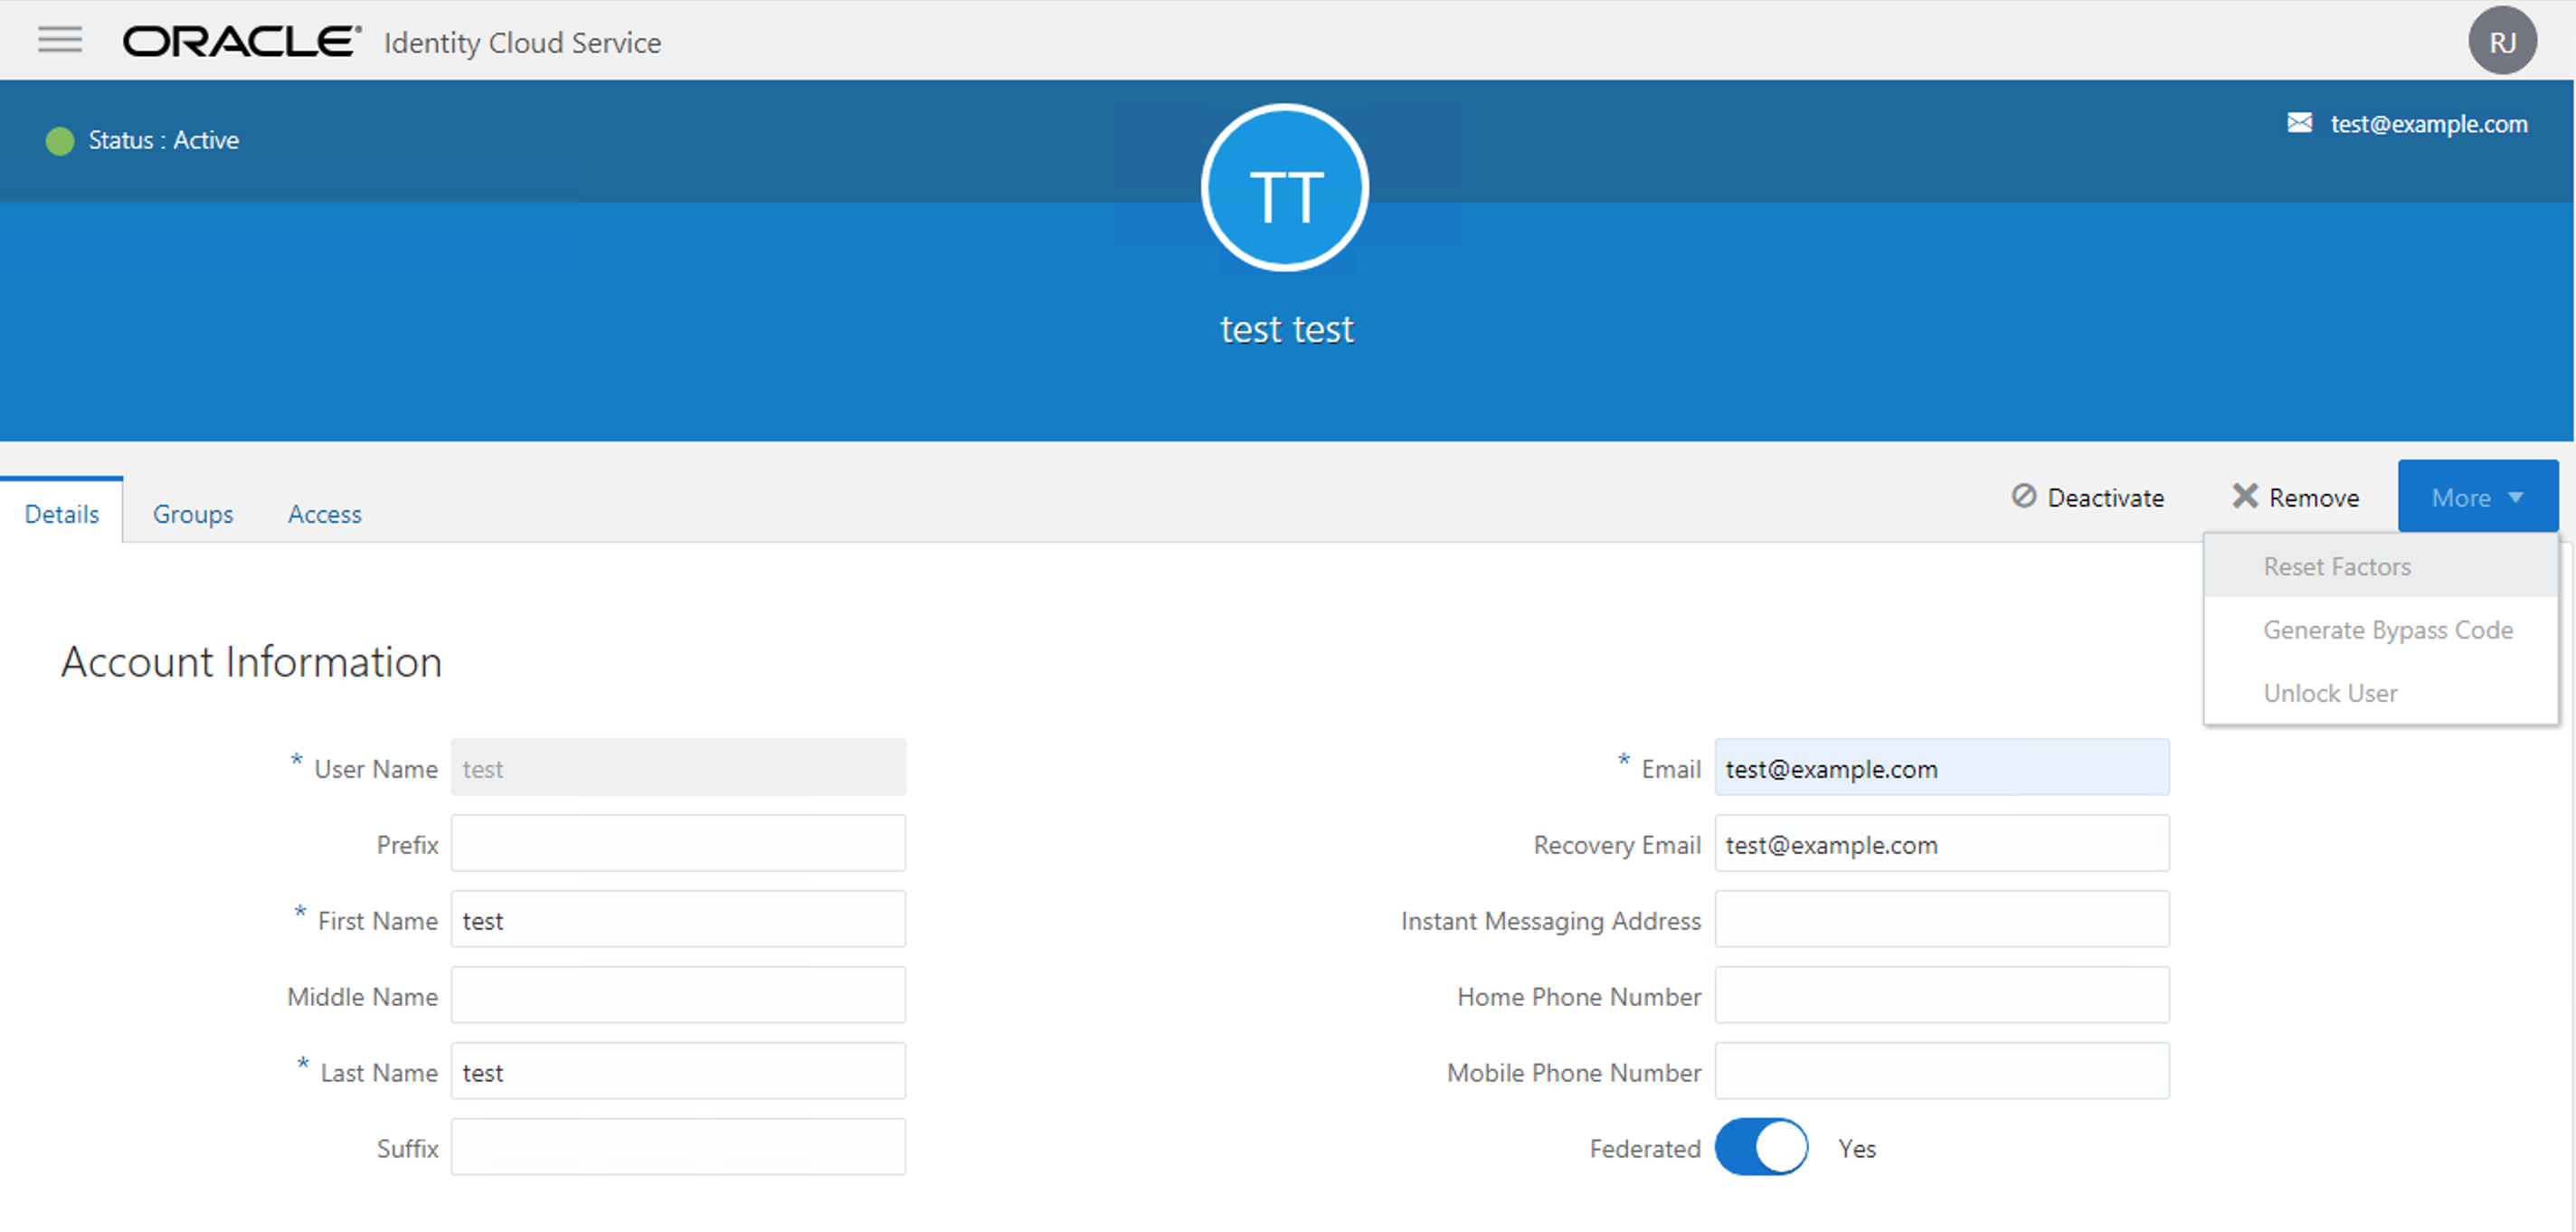
Wait! Why do I need to have user in IDCS_Sec if I’m authenticating through IDCS_Main?
With Identity Provider , we still need to have the local users and groups and their privileges assigned locally. We are just delegating the authentication flow, but not retrieving the user privileges and groups.
However, there is a way to keep it synced, using what Oracle calls “Provisioning Bridge“. I will keep the implementation of this to another article, but you can get more info about it on:
https://docs.oracle.com/en/cloud/paas/identity-cloud/uaids/understand-provisioning-bridge.html
Have you enjoyed? Please leave a comment or give a 👍!